How to make a stunning worktop from concrete!

Making worktops from concrete does sound a bit odd and it's certainly not the first material that springs to mind when you are selecting a worktop. However, for the DIYer it's a great choice; it's durable, unusual and reasonably cheap and simple to produce.


Now, I'm going to show you how. Basically we'll be making a mould for the concrete from melamine, that's the stuff basic kitchen cupboards are made from, it's chipboard with a very smooth finish applied. That finish is what makes it ideal for this application; you'll see why in a moment.


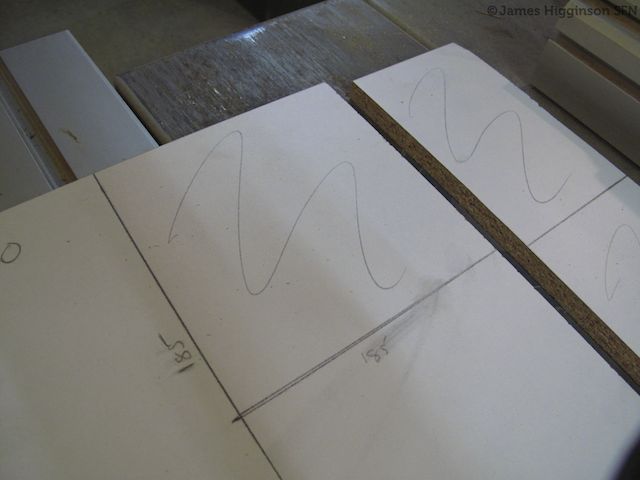
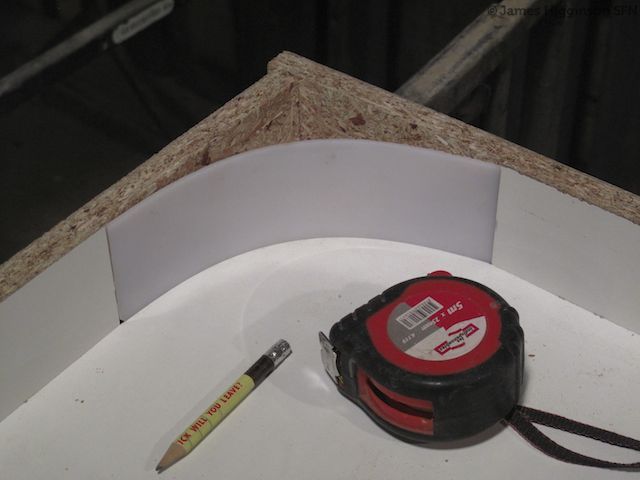
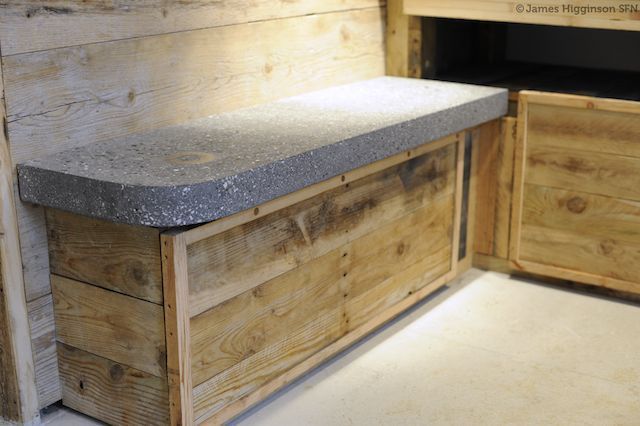
The mould can be any shape or size you want within reason, the main constraint is the weight of the finished piece. It's best to limit each section to what can be comfortably lifted by two people. This small section will actually be a bench seat and you can see I've used a piece of flexible perspex in this corner to round it off. You can also include cut outs for taps and sinks using sections of pipe and various other techniques.


The melamine mould has simply been screwed together using 50mm screws every 20cm, making sure all of the screw heads are accessible from outside the mould as we'll need to remove them later. (Taping over them at this point is a good idea as if they get filled with concrete slurry they will be difficult to remove later).


These moulds are 45mm deep, apart from the bench which is 60mm deep, about the minimum really. Any less and the worktops would be liable to crack.


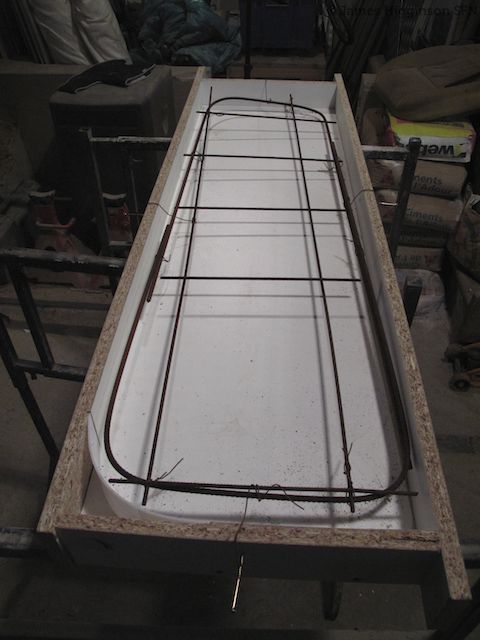
Concrete has quite poor tensile strength, meaning it does not like to flex; this is why it needs to be reinforced using steel reinforcing bars which are readily available from any builders merchants. Here I've used 6mm bar to form a ring and some 6mm 'trellis soude' in the center. I've wired it together and if you look closely you can see it has also been suspended in the mould with wire hangers. This is to stop it sinking to the base when we pour the concrete. We need the rebar to be at the top of the mould or the bottom of the finished piece when we turn it out.


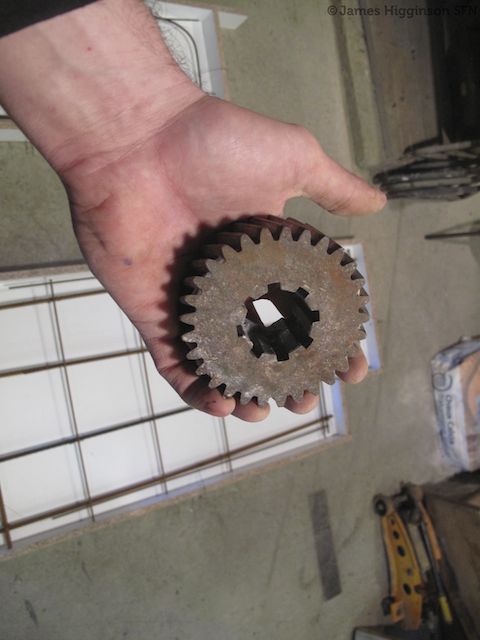
If you want, you can add items to the mould at this point, stones, glass and gemstones are popular and look good. Here I've added an old car part. Objects with a flat side work best.


Place them in the mould. If you're using small items, pieces of quartz for example, use spray adhesive to hold them in place.![](upload://pwCk7JOBijllUmp9H6tenQykVUZ.jpg)


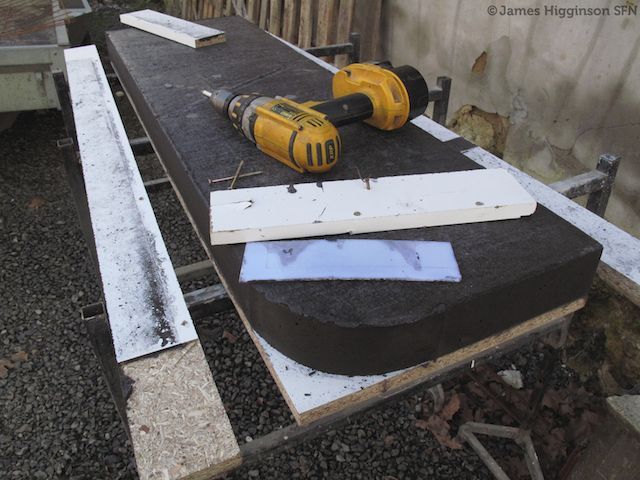
Mix the concrete in a mixer if possible, if not, use a drill attachment. Make sure it is well combined. In this case I have added black pigment to a standard concrete mix.


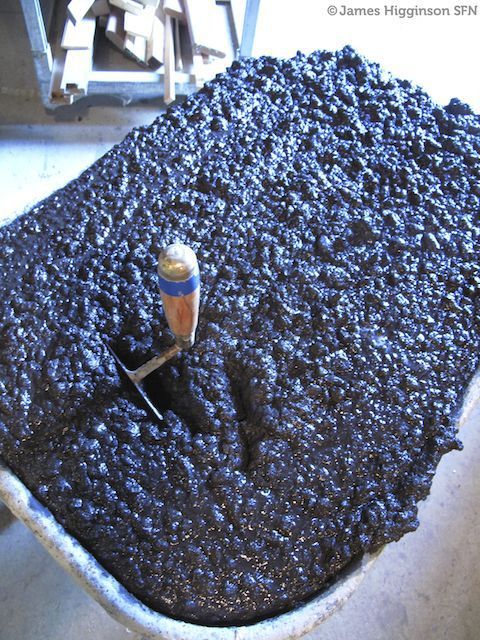
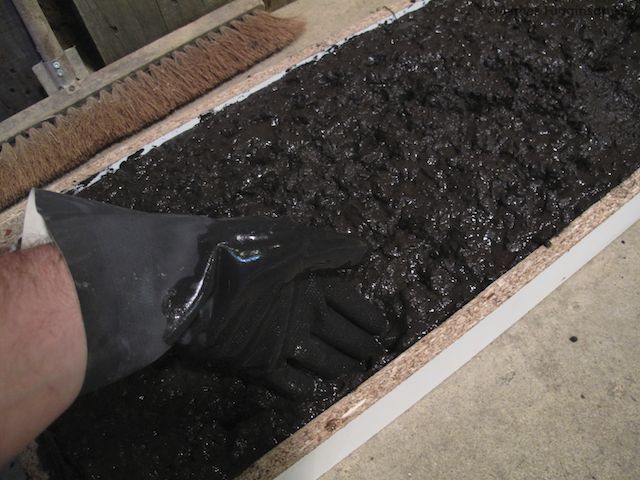
Using your hands push the concrete into the edges of the mould first.


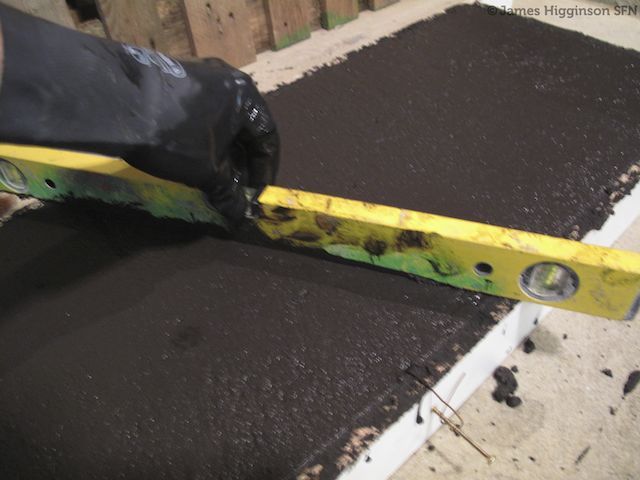
Use a hammer to tap the mould all around, this will help to expel any air pockets which would create voids in the surface. A palm sander works well for this too. Screed off the surface with a straight edge.


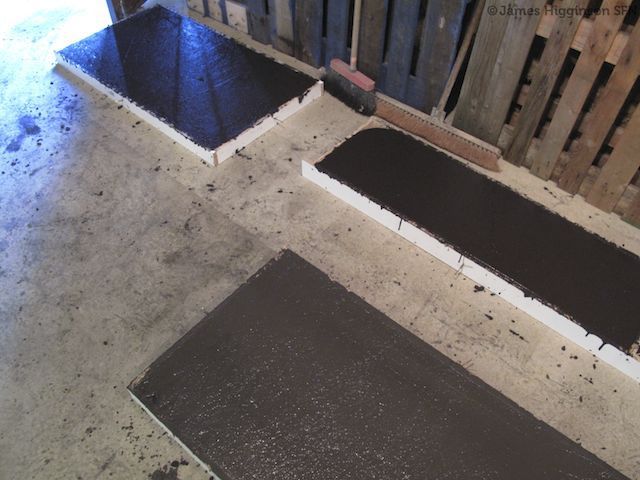
Make sure your moulds are left to cure on a completely flat surface. If it's not completely flat, the weight of the concrete will bend the moulds to fit the surface you placed them on! Leave them to cure for at least 4 days and don't move them in the meantime.


After at least four days, carefully remove the edges, the concrete will still be green at this point and prone to damage. Concrete reaches 90% of it's finished strength at around 30 days, so feel free to leave it longer if you are concerned about chipping the edges.


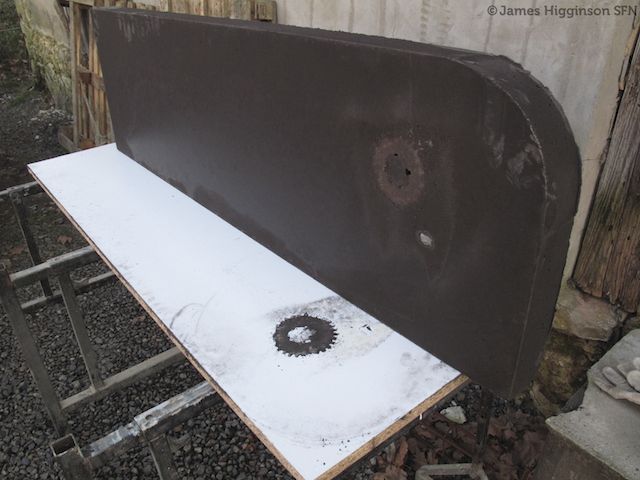
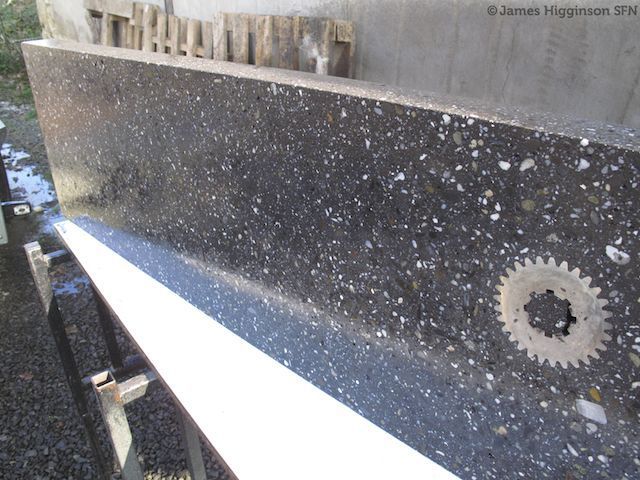
Tap the edges of the base until it freely slides away from the concrete. You can then (carefully!) turn over the piece. Place it back down on the melamine to support it. You can see the gear cog and a small piece of quartz that I placed into the mould.


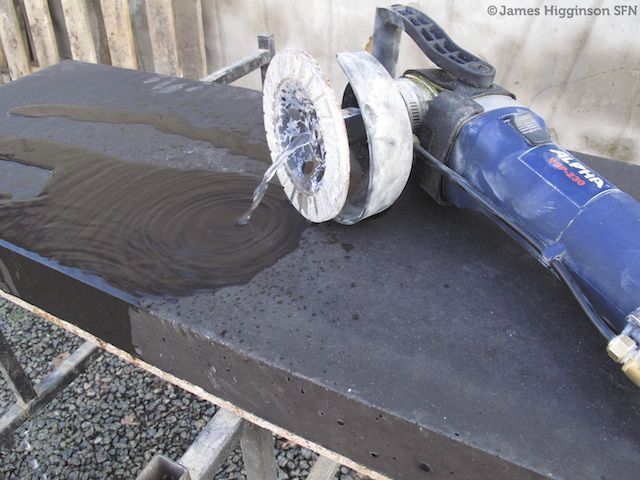
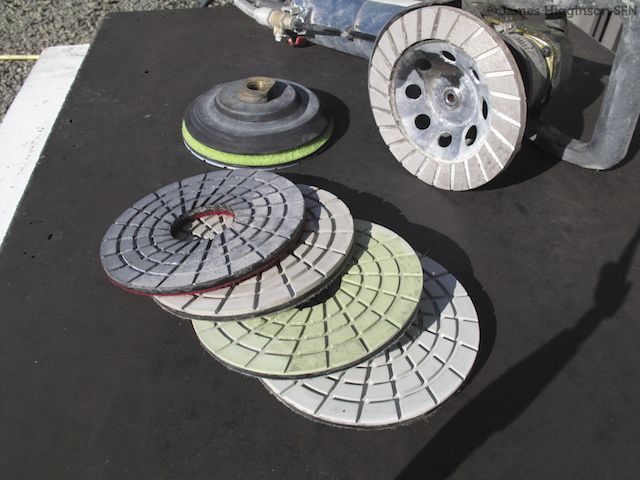
This is the point where you will need specialist tools if you want to polish the concrete. The smoothness of the melamine is such that you could just leave it as it is but polishing will expose the stone from the concrete mix as you will see. I'm using a hand held wet grinder; you can hire these. You will need one with a variable speed adjustment (it should also have a ground fault protection relay), and various grades of polishing pad. In the first instance I am using the diamond cup wheel to remove the surface of the concrete and expose the aggregates, just one or two millimetres will be enough.


After just a few minutes I have removed enough of the surface to start polishing.


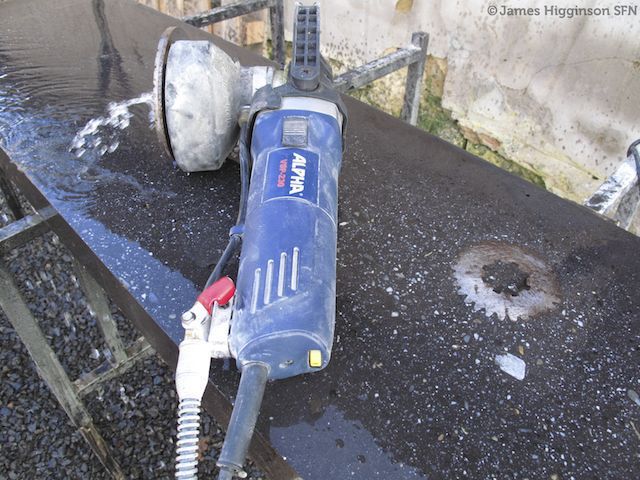
After using the cup wheel, I have a further 5 grades of diamond polishing to complete. This will give me a nice smooth finish. Further, finer grades of disc will eventually provide a glass like finish akin to polished marble! I won't be going that far today.


For this size piece each grade takes just a few minutes to do. So after about half an hour I have my finished piece. It's obviously soaking wet, so leave it to dry out for a while before you carry it inside. If you intend to seal it, depending on which product you choose (Epoxy resin for example), you may have to wait for the full 30 days for it to be dry enough. Some applications (such as this one) don't require treatment as they will not be exposed to spillages.


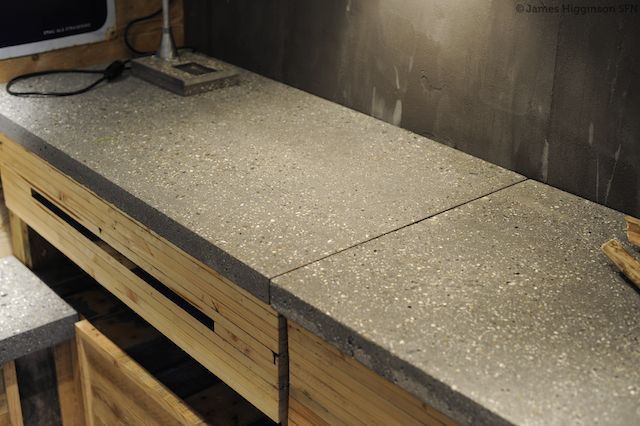
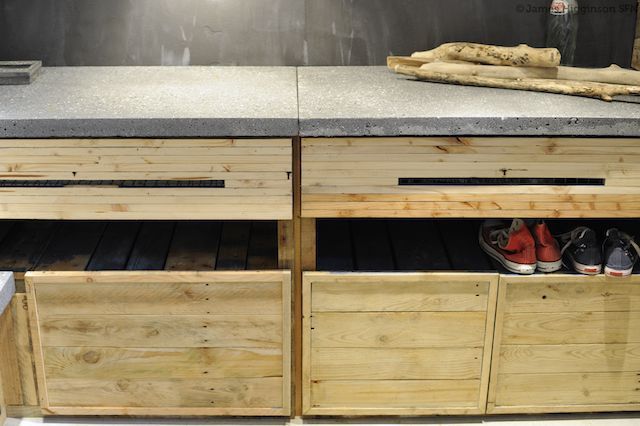
As regular readers will know I’m a big fan of this semi industrial look. Would you have a go at making a worktop from concrete? An outdoor kitchen would make a great first project don’t you think?


Thanks!


James


You might also like - Making a table from discarded pallets and if you want to know how the cupboards were made from some old pallets you can read about that here too.


4 Likes

It would seem that my older link to AdvaFlow 340 is out of date. This one seems to have the info and the address if it is of interest to anyone: Adva Flow 340

You could use tile edging John, casting in-situ is very messy!

Thanks. Another very useful DIY walk through from yourself.

Researching, and thinking particularly of casting in-situ (how many rooms are square , and enables long jointless runs) I see plastic edge profiles are available in the USA. Any information re availability in Europe?

Looks brilliant. Good if you have the space for setting up the mould but I think if I attempted that in our small paris appartment I'd be given my marching orders.

Fantastic-but......a great achievement and must be very satisfying but I can't help feeling that you could maybe achieve something else, very similar, and possibly quite a bit quicker and cheaper? There are loads of granites which are very similar in look, some of them looking quite sparkly and the advantage is that you can have the tops made to measure in a yard very quickly. In addition you can cut drainage grooves for a drainer. I believe that you can order from Eastern Europe at quite cheap prices and have them delivered. Another idea for worktops and floors is terrazzo which has small pieces of different coloured marble and can be quite light in colour. For floors another possibilty is granolthic, but usually used only on larger jobs. I don't want to pour cold water on your Herculean efforts though!

Thanks Mike! I enjoy it too, I think that helps.

Mike, not my first, I did a bathroom worktop before, certainly my thinnest though.

For the pigment I used the soot the came from sweeping our wood burner flue pipe!

It is a standard reinforced mix, nothing special, 32,5 I think, nothing I would change about this really, they all came out well. You have quite a lot to do, I would suggest you do a test piece first, just a foot square will do, if there are any issues with your process they will come up in the test. The most important thing is getting a consistent accurate mix and shoving the mix right into the edges, there really is not much you can do about poor quality edges once you break your mould open. I would also suggest you don't try any too long, 2 meters maximum until you are experienced.

Please ask if you have any questions, glad to help!

Good luck!

James

Theo, I bought my polisher as they are difficult to find to rent, although Kiloutou.fr have them for floor polishing, there is another post on that, it is the same equipment used to polish marble.

Thanxs James, yes had this experience with white cement in the room for my "mafiosi", -its not strong enough and has already a few cracks after 4 month (I bang also with this heavy tripod for the Plaubel on it..) So need to do it all over again. White because then its easier to see dirt ;-). Most of all its good because it is reflecting light so the room is easy for quick portrait shots.![](upload://wTCm8KMqFRxQTda4cR59aVminjW.jpg) Well, and then this grinder thing, please can you give me a link where to get such thing, hopefully its not a budget killer... Looks I have to do the layer much thicker, as you did somewhere here for a bathroom...

1 Like

They are lovely…units and the work tops

White cement can be used but it's not as strong so I would try to avoid any large overhangs. You need to grind at varying speeds so normal angle grinders are no good. Also if you do wet polishing you must have a special breaker on the power supply to avoid electrocution!

Good idea! Could white cement be used as well, eventually even color the white cement. And a "normal angle grinder" would be ok with appropriate disks? Or do I need jet another machine?

Excellent info Kent, thanks, I'll be having a good look at that lot over a beer in a few moments :)

Just finished restoring and installing an old glazed door found at Emmaus, taken me the whole day, needed resizing and bits replacing, luckily I managed to get it done without breaking any of the glass. It looks great and cost less than €30 in total (plus a whole day of fiddling!). Very happy indeed.

What an interesting post, James; I don't know how you find the time...

I once did a course at Boscastle with Carole Vincent, a well known sculptor of concrete public installations:

http://www.carolevincent.org/majorworks.html and I'd like to add a couple of tips that I learned to your blog that may be helpful:

Carole kept very detailed records of mixes using many forms of "fines" and aggregates. We tend to make yer average, bog standard concrete with say: 1 of cement, 2 of sand and 3 of gravel - all depending, etc. Whereas Carole would list - from dust to, perhaps, 15mm stone, TEN different grades in certain relative quantities to ensure there were NO spaces whatsoever. A lot of it was marble. My point is that she wanted the final thing to have no air bubbles at all: it was just like marble. So, a bit of experimenting with those ratios from dust, through different sized particles, to lumps, plus use of stuff like white cement, can give interesting variations.

The other thing was a self-compacting additive that she liked to call "her secret ingredient" but, aha! I found out what it was - and will now share:

Advaflow 340 http://www.resapol.com/datasheets/data265.pdf brilliant stuff and next to no compacting needed if used correctly. There may be an upgrade to this now as that was a few years ago now.

Have fun!

2 Likes

Thanks John :)

Hi James et al. the densifier does exactly what it says in the name it makes the concrete in the first 5mm or denser by causing a chemical reaction between the silica of the densifier and the lime of the cement. It also seals up the tiny pores in the concrete making it harder and therefore easier to polish. It was a while back I did this and I had to look to the USA for the information and products apart from one company I found later in Earls Court. A great resource is this lot: http://www.concretenetwork.com/densifiers/

It looks like things have moved on a bit now as they have nano particle densifier as apposed to the ordinary lithium silicate based product I used.

As Mrs Mop, I can vouch for the bathroom floor. It is v easy to clean, doesn't show the dirt and looks fab. Everyone loves it!

ps John and Tracey - any chance of a photo of you lovely people please? Thank you!

John, can you post a link to the densifier product please? What does it do?

Yes Tracy, you can do polished concrete floors too, here's one I did earlier :) http://www.survivefrance.com/profiles/blogs/polishing-a-concrete-floor