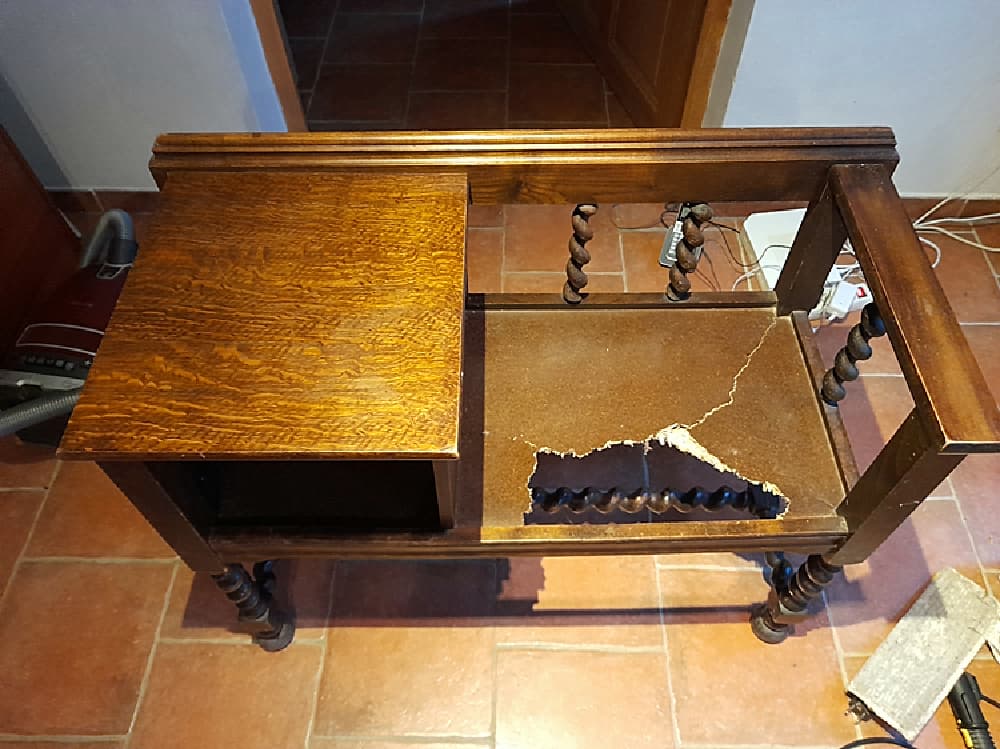
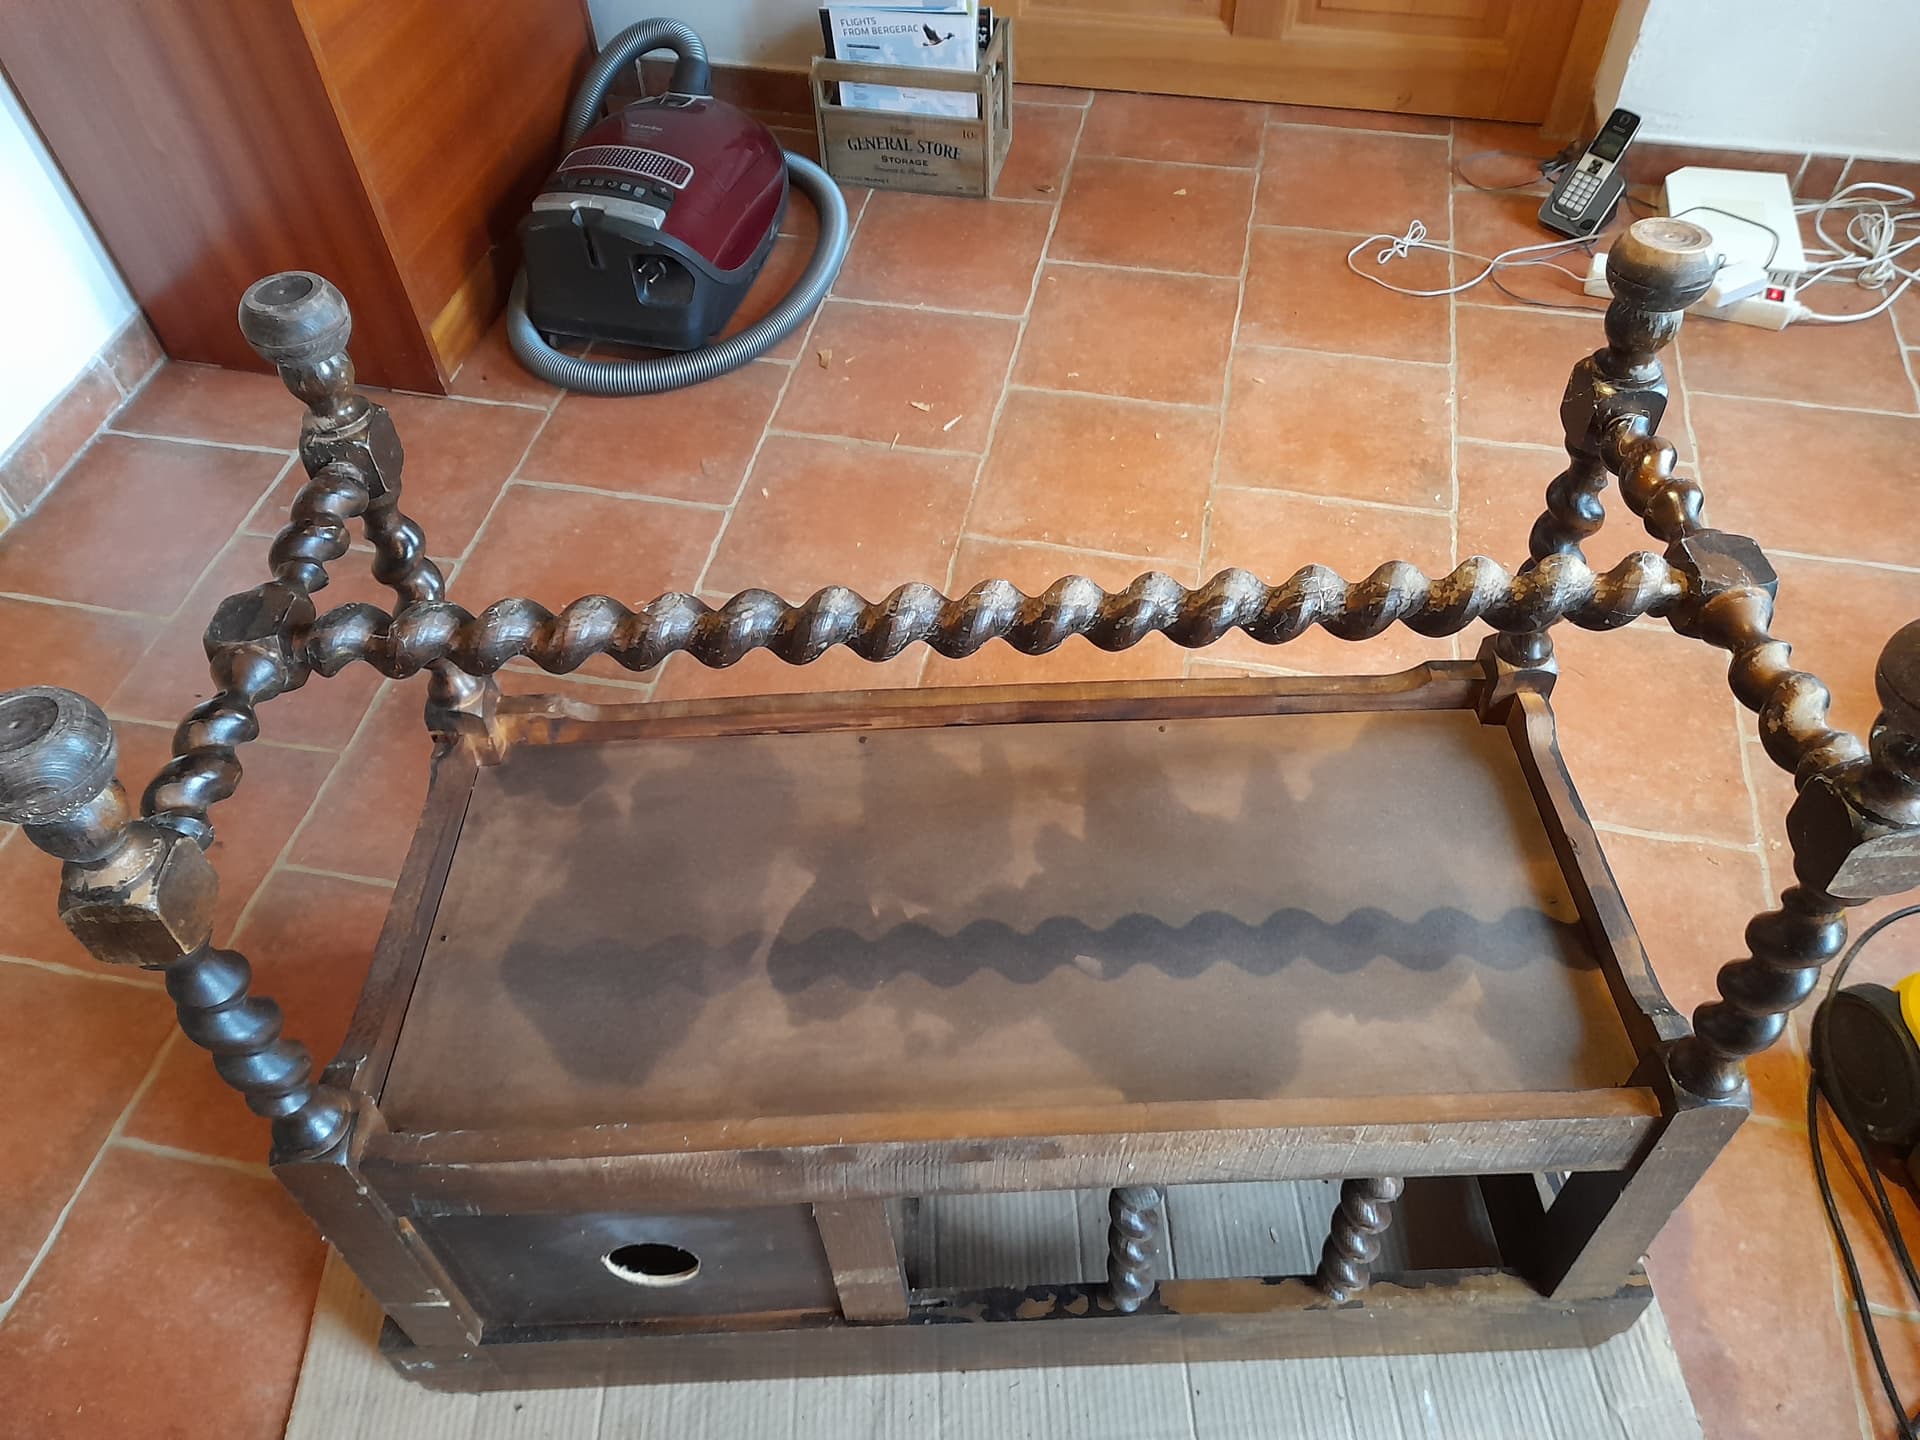
I’d be grateful for some guidance please. I have an old-fashioned hall seat in our gite which a guest managed to break last year. I can only imagine they stood on it to get that amount of weight to break it. The seat itself is made from chipboard and stretches right across from the seat part itself to the small alcove alongside where I keep out livebox. It’s only the seat part which is damaged.
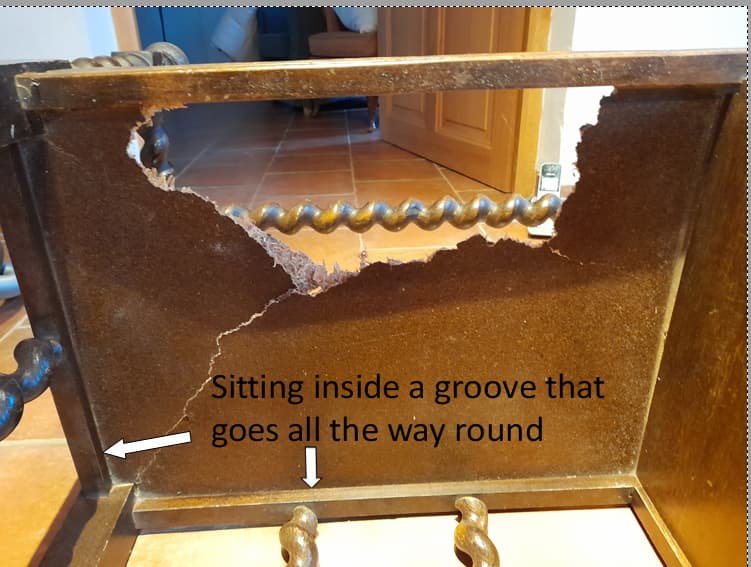
The chipboard is secured in a nice groove which goes all the way round the frame, which makes me think the frame was assembled round the chipboard.
Being a bodger, I’d be grateful for a simple solution if possible please. I am thinking I do not need to take out all the chipboard. The part under the alcove is not damaged, just bowed slightly, so I’m proposing just to nail it back up to the vertical wall between the alcove and the seat itself and then cut out the damaged seat.
But how then, do I secure the new chipboard (or whatever) to the frame? I cannot slide it back into the groove. Or I can only slide it into the groove on a couple of sides. I’m assuming I need to create a “support” on which the new seat sits. Would it be sensible to have a support bar that goes right across from the back to the front of the seat to give more strength to the chipboard?
You could partially dismantle the end to allow you to slide a piece of plywood in from the end. Plywood can be bought and cut precisely at the Brico.
Alternatively install a number of supports on the underside which would be hidden to create a frame then put plywood on top (again cut precisely. Frame could be installed using either brackets or small diameter “hidden” lost-head screws.
Once more option is simply go to brocante and get another
Without actually seeing it, it’s difficult to give good advice. But…where the bit is missing can you get into the rebate/groove? If yes then you can glue a piece of similar thickness wood in that vaguely resembles the broken bit. Then, using contraplaque (10 mm) cut a piece to fit the whole of the underside, holding it in place with battens around the perimeter, screwed into the feame and up into the vertical divider. Then cut a piece to sit on top, glue and screw down into the already fixed underneath battens.
Ooooh no Mat. Thanks for the suggestion but that’s definitely above my paygrade!
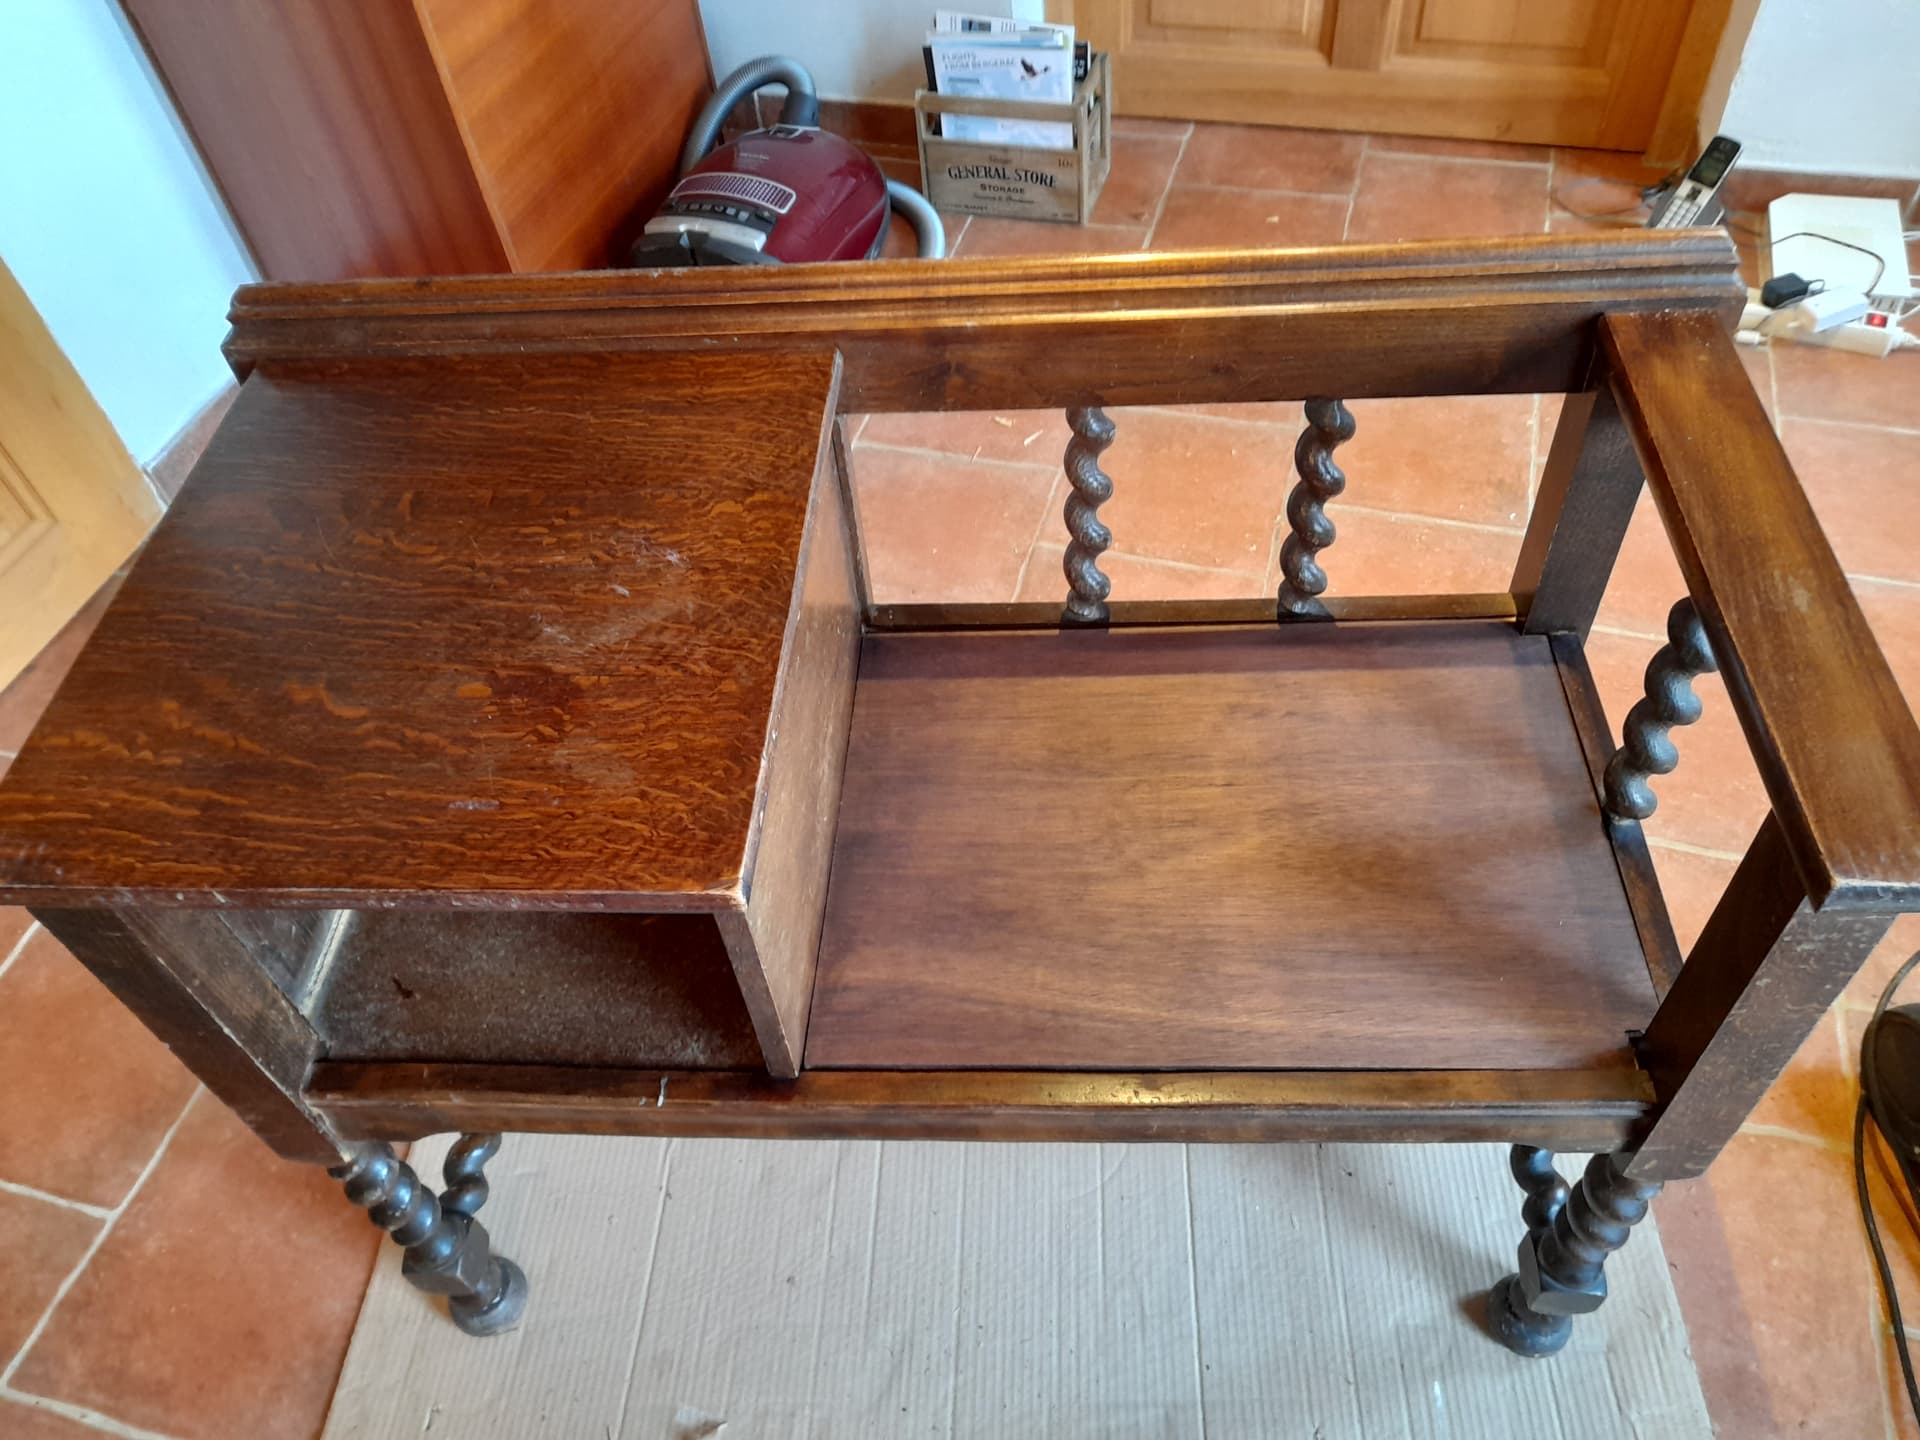
I am quite fond of it, not least because it exactly fits along the wall where the telephone point is and is raised enough for the socket to fit neatly underneath. None of that was planned, just serendipity.
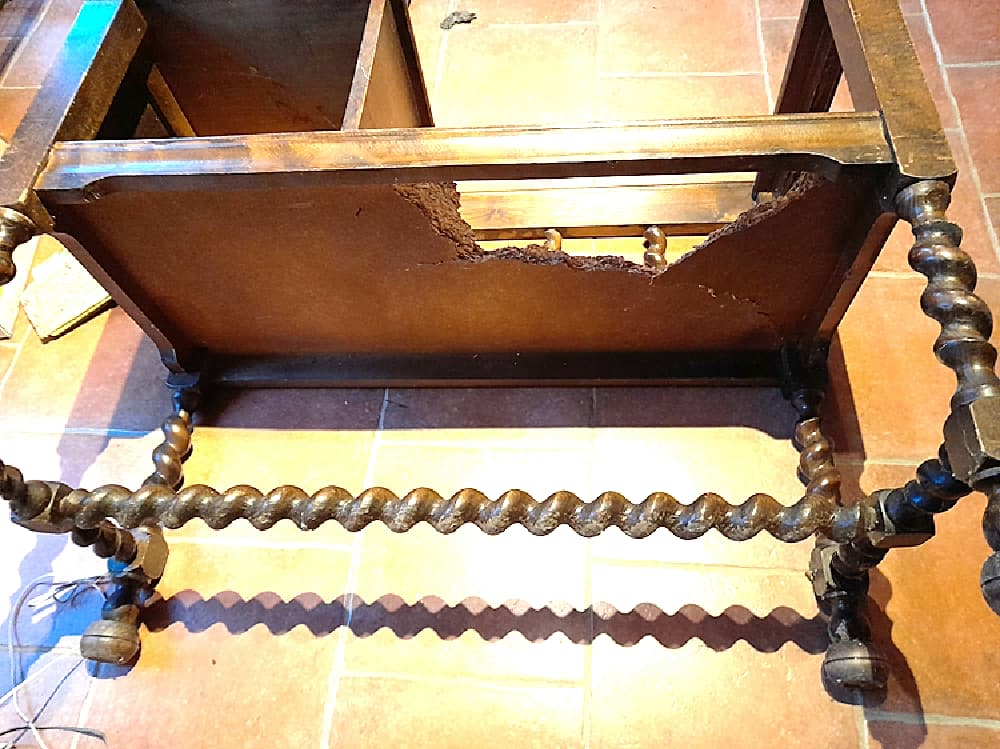
I’d be inclined to take all of the chipboard out, replace with a new panel, and then strengthen against flexing by nailing/screwing in a couple of strategically placed struts from one side to the other. The problem I foresee with that approach is if the chipboard is glued into the grooves, then it will probably only come away in pieces, and you would probably have to chase the remaining bits out of the groove with a chisel…
I would get a bit of plywood the size of the visible piece and have it sit on top of the frame, going right to the edges. You would have to cut out the corners, maybe with a bit of insulation to fill up between the original and the new bit. You could glue it or screw it down or both and maybe stick a cushion on to for good measure.
Bodgers unite! I too would get a piece of chipboard or even wood to go on top. A bit of fiddling to cut corners neatly, and a bit of sanding, sealing edges so looks nice. Then thin cushion on top and all done.
Not a bodge but simple straight forward thinking.
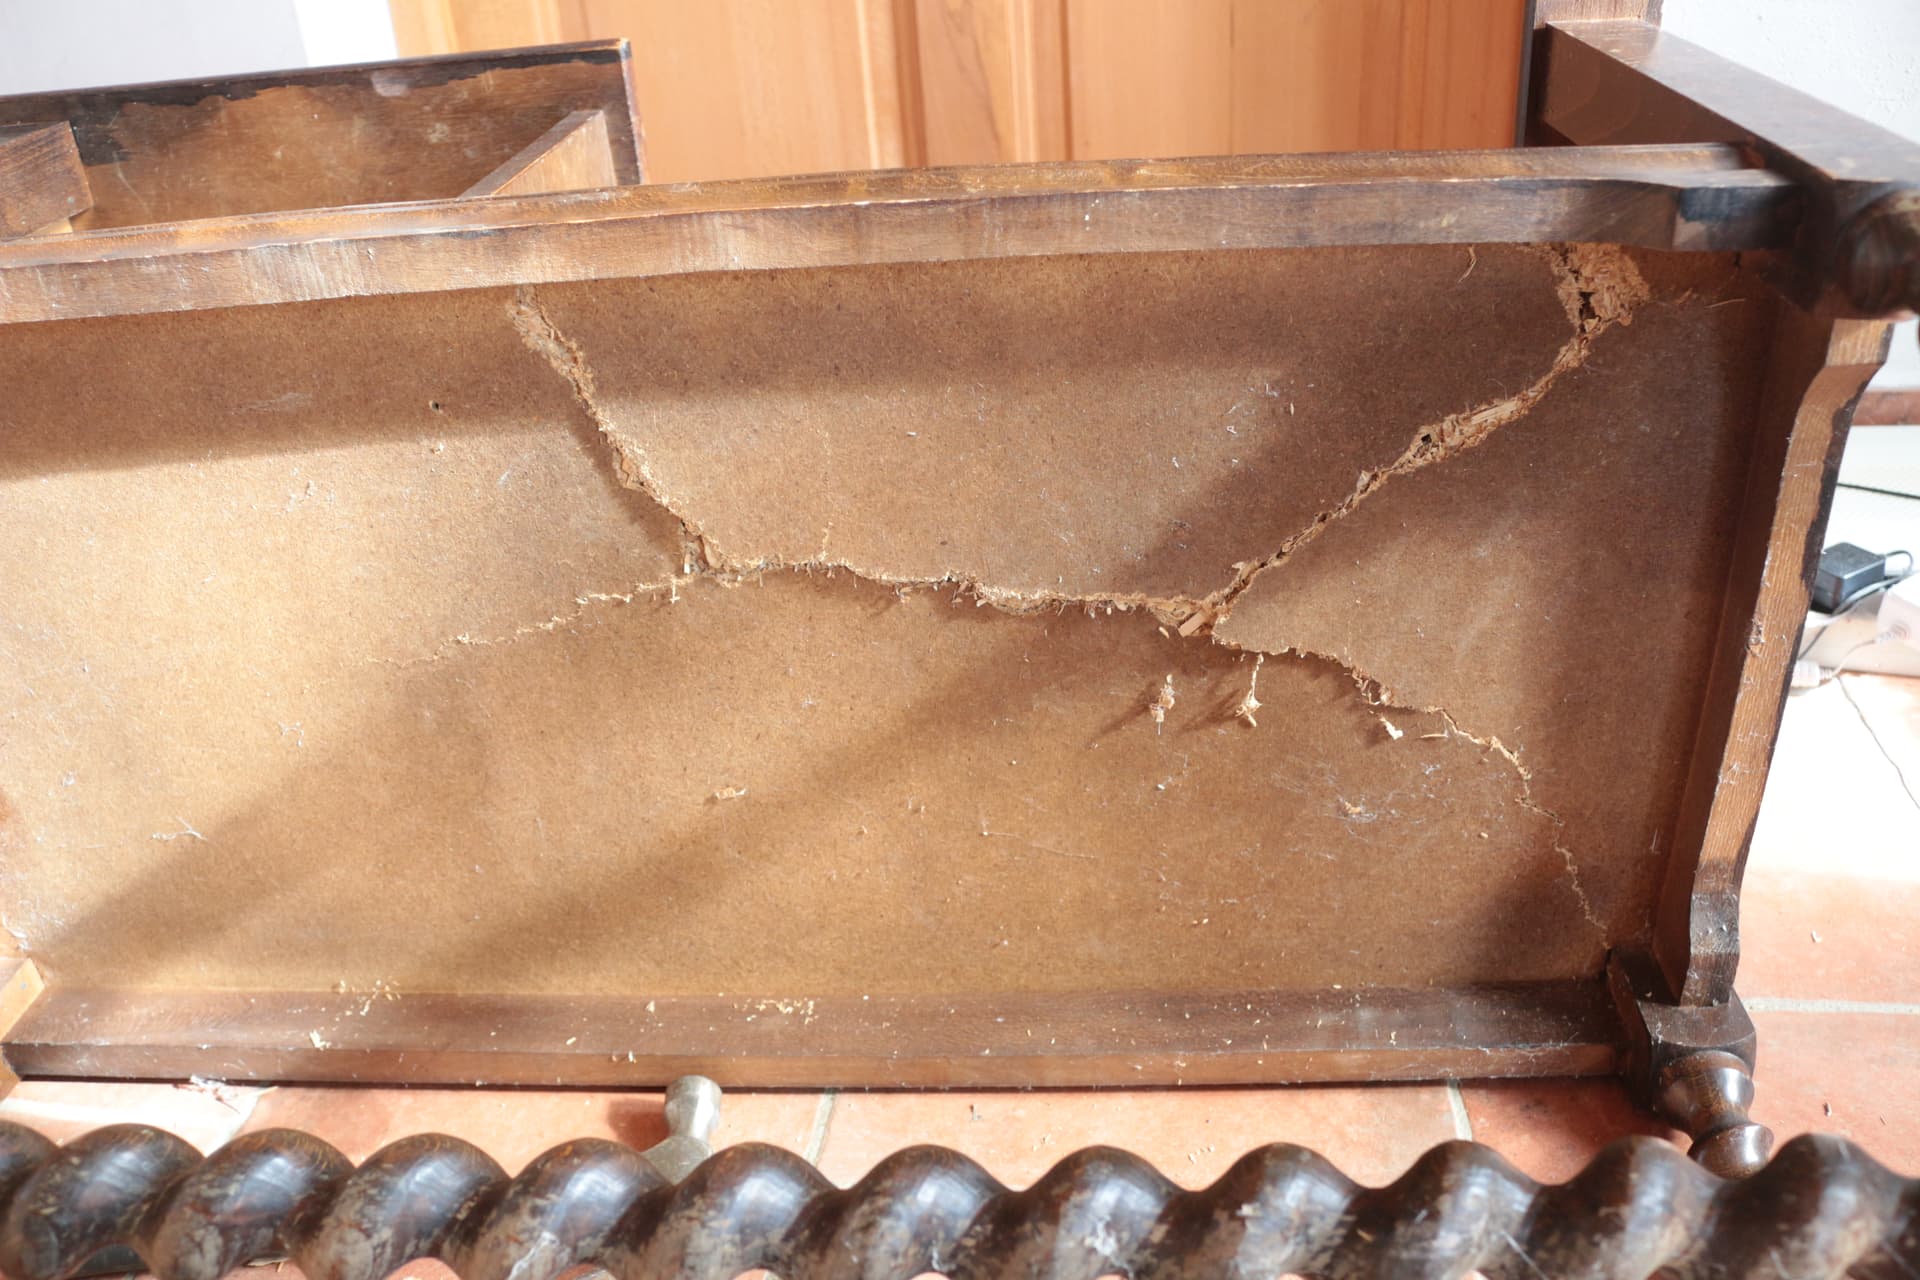
From the photo it looks like there is at least a 9 to 12mm upstand from the top surface of the damaged chipboard to the horizontal edge of the rebated surrounding frame. As Vero has explained a cut to size plywood panel glued to the existing chipboard will do the trick. The new plywood will have sufficient strength in itself for the use intended and the edges will be supported by the chipboard that remains in its rebate as at that point it will be extremely strong in compression.
For ease best to use an adhesive such as no nails.
Don’t worry about the underside of the furniture when complete as it isn’t seen.
Ideally you need to support the damaged chipboard in its original position so that you can apply good downward pressure on the new plywood insert to be sure of good adhesion.
Thank you @JohnBoy. Having been offered this solution by @JaneJones and @vero and now you, I realise I can put the broken off piece of chipboard back in the hole and slotted into the groove from whence it came. Why remove it all (which is what I was visualising) when it can contribute to the strength of the new seat. I will follow the advice of you three. I realise the edges that fit in the groove are pretty robust and by gluing the whole thing together it’ll be strong enough. I’ll stain the wood.
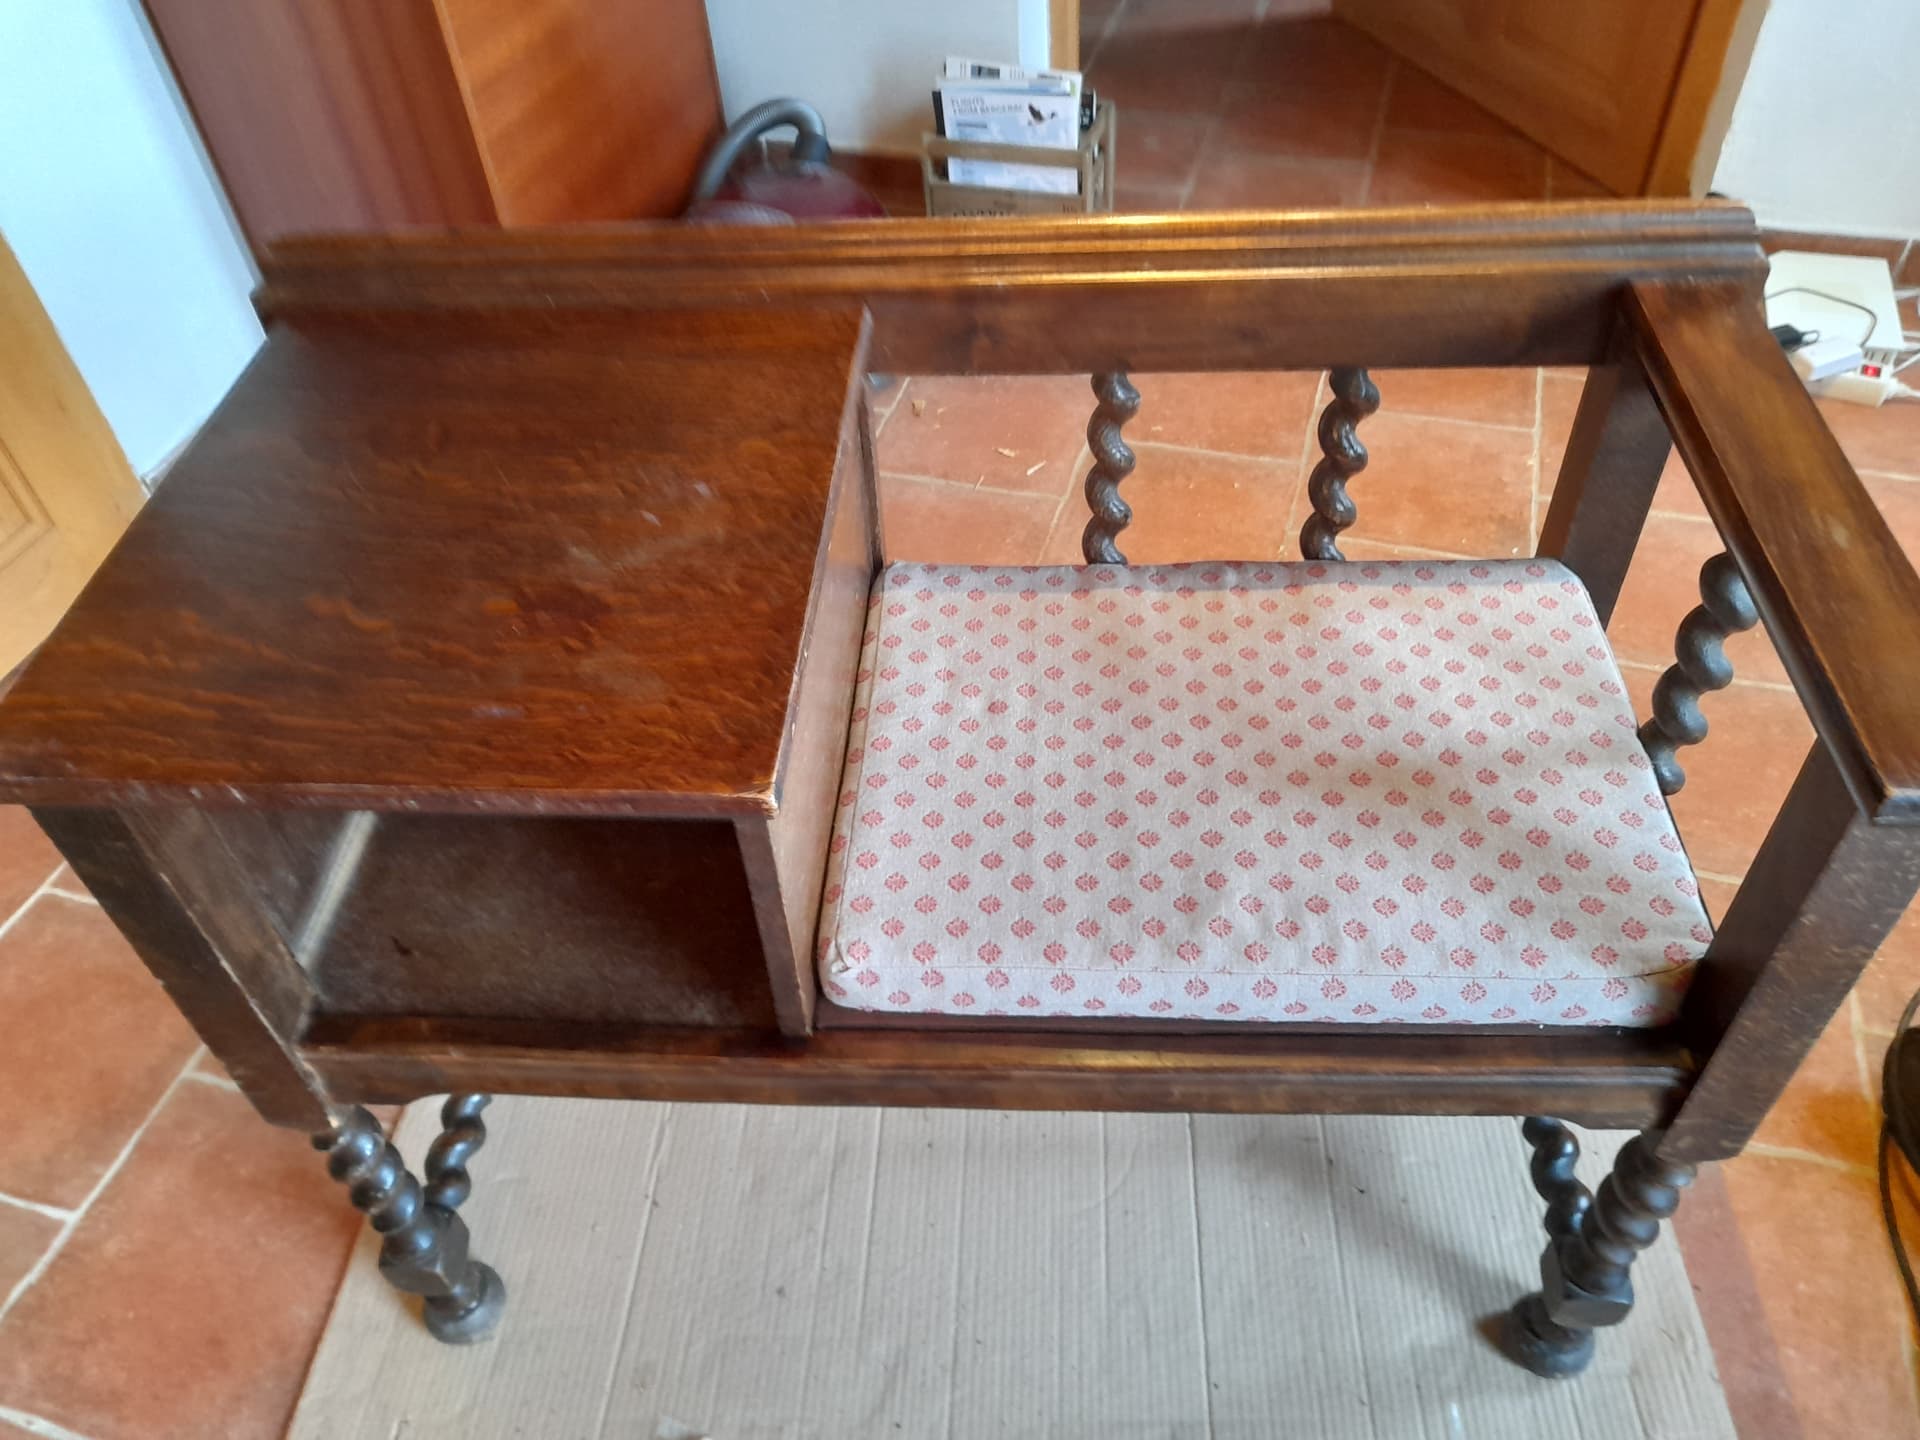
I already have the cushion ready to go back where it belongs.
Glued it in place with no-nails and used a wooden mallet underneath to bash the pieces of broken chipboard hard up against the plywood, having (as best I could) slotted the broken off bit back into the hole. Then turned it back up the right way and rested the seat on a pile of books to keep the chipboard and plywood in contact while it dried.
Underneath looked pretty grim and the chipboard was flaking away, so I’ve covered underneath with hardboard, again using no-nails and a few furniture tacks as it’s very uneven. I need another few coats of stain on the hardboard to even it up.