How to - Polish a concrete floor

Being a fan of the semi industrial look, I've loved polished concrete since I first picked up Fu Tung Cheng's book on the subject, 'Concrete Countertops'. Recently I poured some new concrete floors with the intention of polishing them; here's a bit of information on how I did it. The post is intentionally brief. I'm quite passionate about the subject so I encourage you to ask any questions you might have and I'll do my best to impart some of my knowledge of the subject.


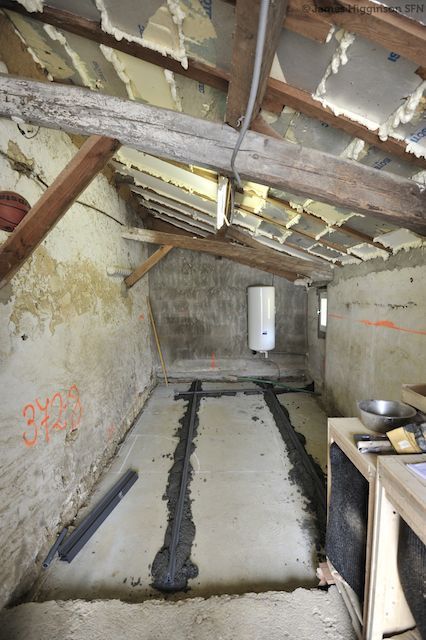
If you already have concrete floors then you're off to a good start. In this case I didn't. There was originally an earth floor in this part of the house, so I needed to pour new concrete. The benefit of this was that I was able to make the floor perfectly flat to within a tolerance of just a few millimetres; this meant that there was less work to do to polish the floor.


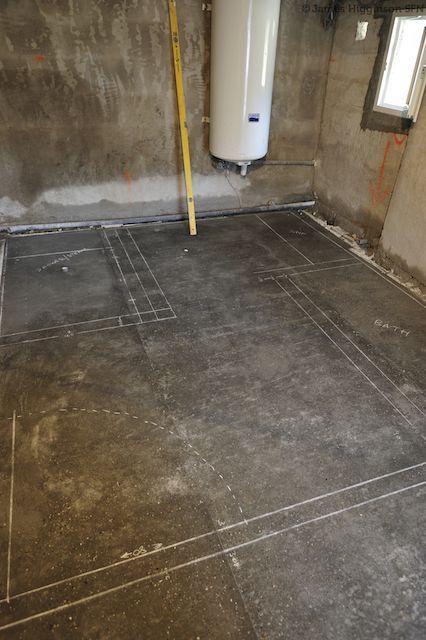
Using what are called expansion joints or 'joints de dilatation' - I was able to level the floor off with a screed batten very easily. The joints function as a guide when sliding the batten across the surface thus ensuring an accurate and level finish. That is, assuming you fixed them in place correctly!


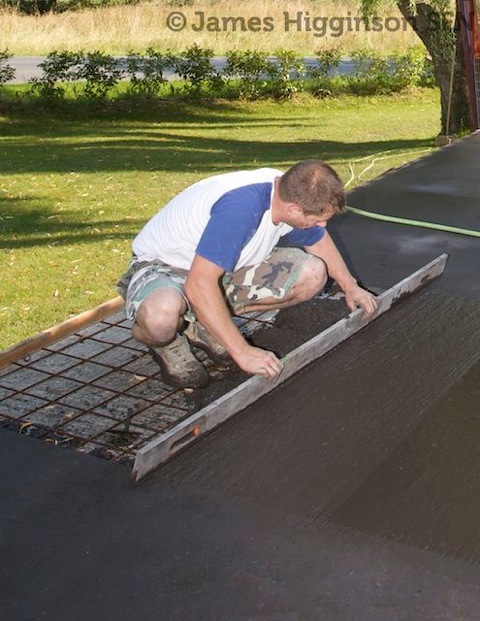
This photo is obviously from another job but hopefully you can see how I'm using the joints to create the level surface. Large concrete surfaces will require these joints to control cracking in any case, so installed like this they perform a secondary purpose.


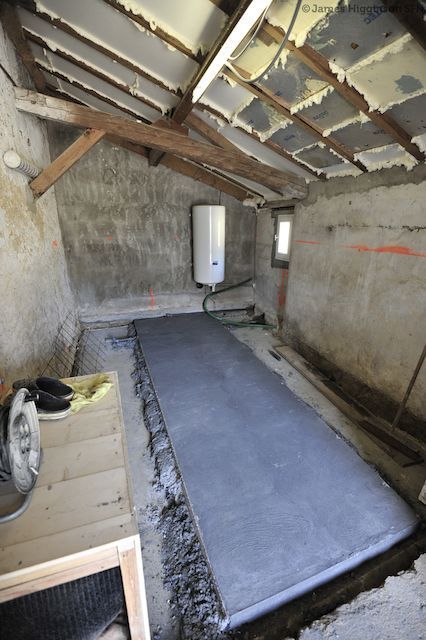
Here, the central panel is poured and curing, the next day I will finish either side. If you try to do it all in one day you'll damage the surface with the screed batten.


Don't try to polish concrete until it's at least 4 days old, the surface will come away too readily and it will be harder to achieve a great finish.


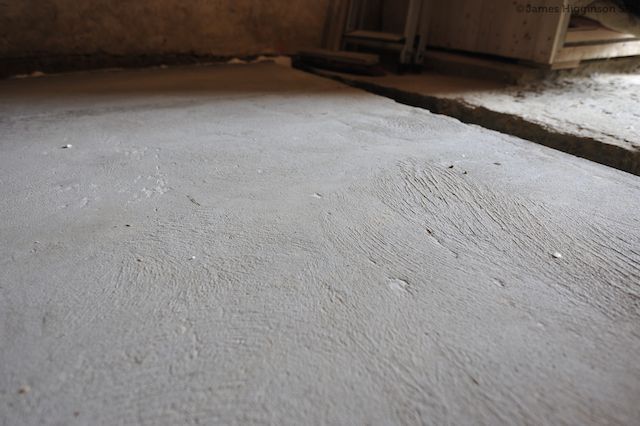
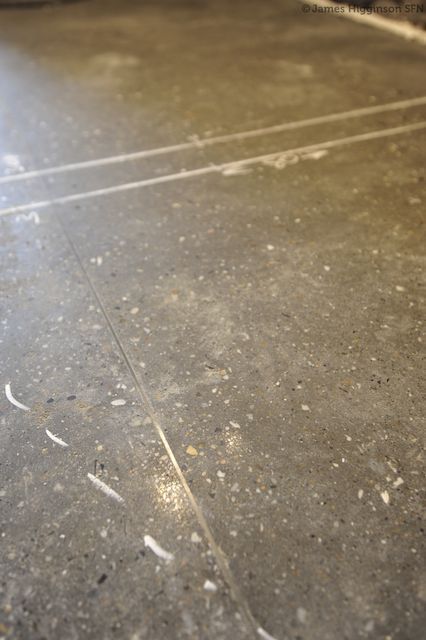
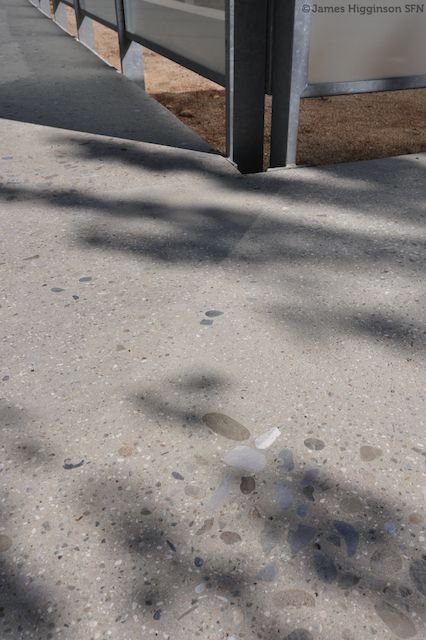
As you can see, the floor is nice and flat, there are still pits and divots in it though, so the first stage of the polishing process is actually grinding the surface away. This will firstly make it perfectly flat but it will also expose the aggregates within the concrete. These coloured stones will then be visible in the final finish; this is what makes it attractive and interesting to look at. Without this stage you would simply be polishing the very fine sand and cement portion of the concrete and you would be left with a plain grey floor surface.


This stage is very important. Take your time and make sure you haven't missed anything. During this phase it is very difficult to see the surface if you are using a wet polishing technique as I did here. The amount of slurry generated makes it impossible to see how you're doing. You have to stop frequently and clear the floor with a squeegee.


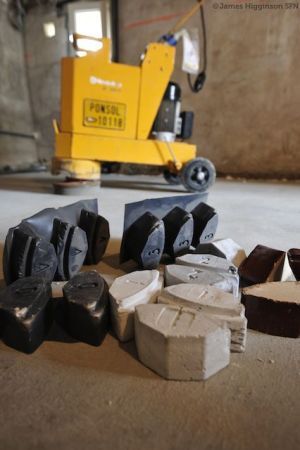
The machine I used was this marble polisher from Kiloutou, it comes with the grind wheel (attached) and various different grades of polishing pads. The grind wheel stage is hard work. This is not a machine designed to polish concrete and as such, you have to lift it to get it to spin on the very rough concrete. Subsequent stages don't require this. I did this a couple of years ago, and I notice they now have more specific concrete polishing equipment available in some branches including dry polishers which will be required in cases where water can't be used.


Dry polishers are used in conjunction with an industrial vacuum cleaner to keep the dust to a minimum.


Working methodically and with progressively finer grade pads, the surface was polished to a fairly high sheen. You can go much further than I did with this and end up with a mirror finish, just like marble.![](upload://g1EQEIFjP9GBkDbvHV3MlscwNTC.jpg)The surface is still quite dark after a day or so due to the amount of water required.


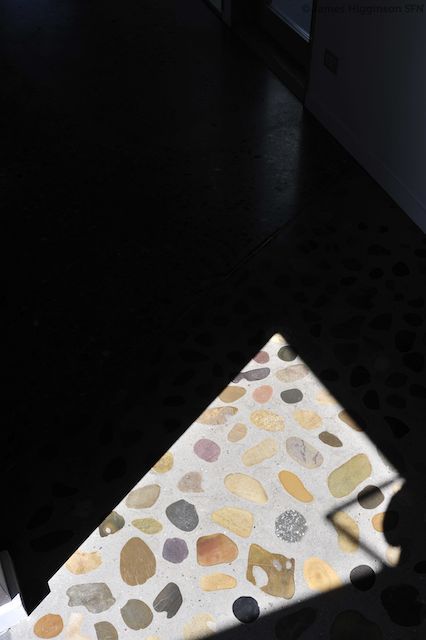
You can see the small stones in this image, the more grinding you do in the first phase the larger the aggregates will appear in the finished product, as you can see from the images below taken at the fabulous hotel 'Aire de Bardenas'.


Some of the aggregates in those floors are so large they must have been cut in half and placed manually before polishing.


Hotel Aire de Bardenas images below![](upload://gUTTcUAbyknDouqGUtPFlDK3Pte.jpg)


Polishing concrete is becoming more popular outside of the US where it has been employed widely for quite some time and as a result, polishing equipment is becoming available to hire making this a potential DIY job. Given the cost of more traditional floor finishes it is potentially on a par and with careful planning could easily cost less than a tiled surface. It is certainly an unusual and unique option so, would you have a go or do you prefer a more traditional finish?


Thanks


James

1 Like

Worth a try Shirley!

Hi Wendy,

I've also made a bathroom worktop from concrete, the mix I used it standard reinforced concrete strength, just what it says on the bag. You can add pigments and other objects too to make the pieces more interesting.

This site is a great resource for info on the subject http://www.concretenetwork.com/

Would love to know how you get on!

James

This is the mould I made for the worktop

Some of the bits I placed in it

Pre polishing

The finished piece![](upload://yLqaqHQogvv3Ecg2jlzf6o93bkM.jpg)

Thanks for your clever and informative post. Timely too, as we are just about to move to our house and I was wondering if it would be possible to used polished concrete for the floor of my workshop. We are in Sri Lanka at the moment where polished concrete is used everywhere. Have you ever tried making kitchen or bathroom units with it? That's something I am also thinking of trying.

But what sort of cement or concrete should I use?

Thanks, Wendy

Thanks Heather *blushes*!

James your ingenuity astounds me...everything you've made...and shared here at different times is fantastic. From using pallets...and creating walls...and tables...and now this.

WELL DONE YOU!

You are right, this white cement is not as strong and the whole thing is that the surface is only looking good when it is in one piece like seen on your bathroom pic. Cracks would be like having tiles. Must make a calculation on ca 20 m². Guess this will be a lot of sacks. How many m3 pebbles to add? Looks like the preparation is most important so that everything can be cast in one go in a day.

If the existing concrete is solid and the height increase is not a problem for doors etc, I would lay a reinforced slab of 10cm using expansion joints at regular intervals. You might get away with less than 10 but I don't think I would risk it with white cement.

James, yes its actually a terrace now and the current concrete layer is aprox 8 cm strong but is old and looking ugly, has few little cracks as well, but must be possible to add a thick layer on top. The reason why a white floor is because once a conservatory with glass around white will reflect sun / heat during the summer, otherwise the air-con will run all the time. During the winter the sun will warm up the rooms to some degree.

Theo, your questions depend upon what you will be laying concrete on to. Will you excavate the existing floor or lay new concrete on top?

You should have posted this earlier! looks great! Now is all wood... Here in France they are selling this white, real white concrete which I could imagine in the the planed conservatory (aprox same size as on the pics). I'm not such skilled artisan and its quite a lot of work but what bothers me more is arguing & complains about dust, noise etc... What is when it cracks? How thick is the layer? Did you used special pebbles? Where to hire such machine? Questions after questions... Any idea?

Ok I see what it is, I don't see why you can't use that as aggregate. But your local quarry will be able to supply a suitable aggregate to save you preparing it yourself. Or your builders merchants can deliver in Big Bags (1500kg). Quarry will be cheaper though if you have a trailer.

Hi James

Thank you for taking the time to respond to my query. I'll give it a go. I may well be mis-spelling casteigne (Castine?), it's angular pieces of white stone often used for paths and terraces round here.

Cheers

Chris

Clare, this looks like the machine you would need

http://www.kiloutou.fr/construction-amenagement/gros-oeuvre-beton/surfaceuse-ponceuse-de-sol-beton-230-v-largeur-280-mm

Thanks Chris

I did make a trial worktop section to see what it would look like in white cement. I used standard aggregate, the sand was yellowish not too grey, that will depend on your local quarry. It came out as you would expect, a nice creamy light colour. It would look very natural as a floor finish. As your local stone is white I imagine your local sand will also be light in colour so that should work fine. I don't know what casteigne is though?

James

Hi James

Loved the look you got there. I may well use this technique on a future project.

As you seem to be into concrete, I wonder if you have any knowledge of using white cement to make a lighter, less grey, concrete (not polished). I want to cast a concrete floor in my basement which is carved out of rock, but want something closer in colour to the local stone (Quercy white) than ordinary concrete will give me. Any suggestions? do you think I could use casteigne (sp?) as aggregate?

Any advice welcome

Chris

Yes Clare, I have a small machine for polishing worktops or small areas like that. I had to buy it though as I couldn't find anywhere to hire one at the time.I have asked Kiloutou if they have any new equipment available. I'll let you know.

I think it all looks fantastic. We have a small area at the entrance to a small apartment linked to our house. We were going to tile it but after seeing this, polishing may be a great alternative. The area is less than 2 sqm though and your machine looks quite big. Can you get smaller polishers or even hand polishers????

Ok James will keep you posted

Yes Catharine, you can have the fridge, it is attached to a nice townhouse in Jarnac......

http://theceliachusband.blogspot.fr/2012/03/la-maison.html