If in doubt I always consult our friend youtube ![]() I’ve managed to do things I would never have even contemplated years ago, and now ready to take on the world
I’ve managed to do things I would never have even contemplated years ago, and now ready to take on the world ![]()

If in doubt I always consult our friend youtube ![]() I’ve managed to do things I would never have even contemplated years ago, and now ready to take on the world
I’ve managed to do things I would never have even contemplated years ago, and now ready to take on the world ![]()
It looks so easy… and is… if one has as much working-space as shown in this video.
My washbasin has a center column/pedestal with the smallest space availble for fiddling…
darn nuisance, but do-able just the once and never again… I hope.
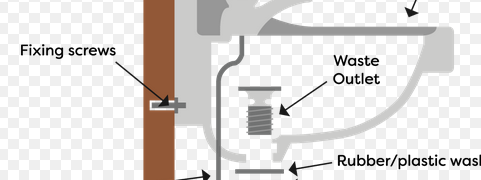
It’s probably leaking from the top as the bottle trap is full of gunge. Long hairs (as suggested upthread) are the most common culprit.
Very, very easy to remove the trap, then tip the gunge into the bin and refit it. If you’re squeamish, buy a new one - it’s very simple to fit. No tools required apart from a pair of hands.
I take @corona 's point about the lack of a screw fitting above the joint, but the type shown is probably more common here in France. We have 6 of them in our house and they have never given any bother - but I do unscrew the botton ‘bottle’ bit once a year and clean them out.
Not my favourite job.
But spending cash is even less of a favourite!
In my bathroom, we have to undo the top “nut” and the other-side “nut” there isn’t sufficient access to undo the bottom section in-situ (inside the pedestal) for emptying/cleaning…
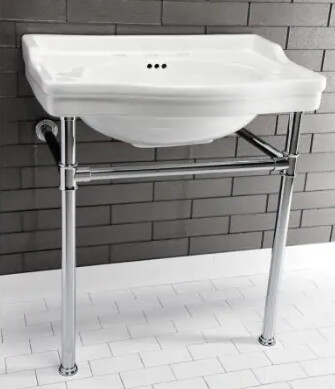
Mind you, it’s taken 5 years or so for it to gunge up… but I can’t go through all that again, even in another 5 years… I need a pair of legs… or perhaps even a frame… like in this photo
A quick fix is LS-X. It takes a bit of getting used to because it actually needs the water to make a seal. So don’t dry the joint but wait for a drip then lightly put in on and don’t try to smooth it. The drip may appear somewhere else but do the same again. I had a constant drip at the back of the toilet three weeks ago and its still okay. Perhaps not a permanent solution but I 've always found it very good in the past
Thank you everyone for the overwhelming encouragement to “go for it”.
And to @geoffrey_Croshaw for a bodger’s fix. 
I have looked at it again and will report back in due course.
go Sue, go 

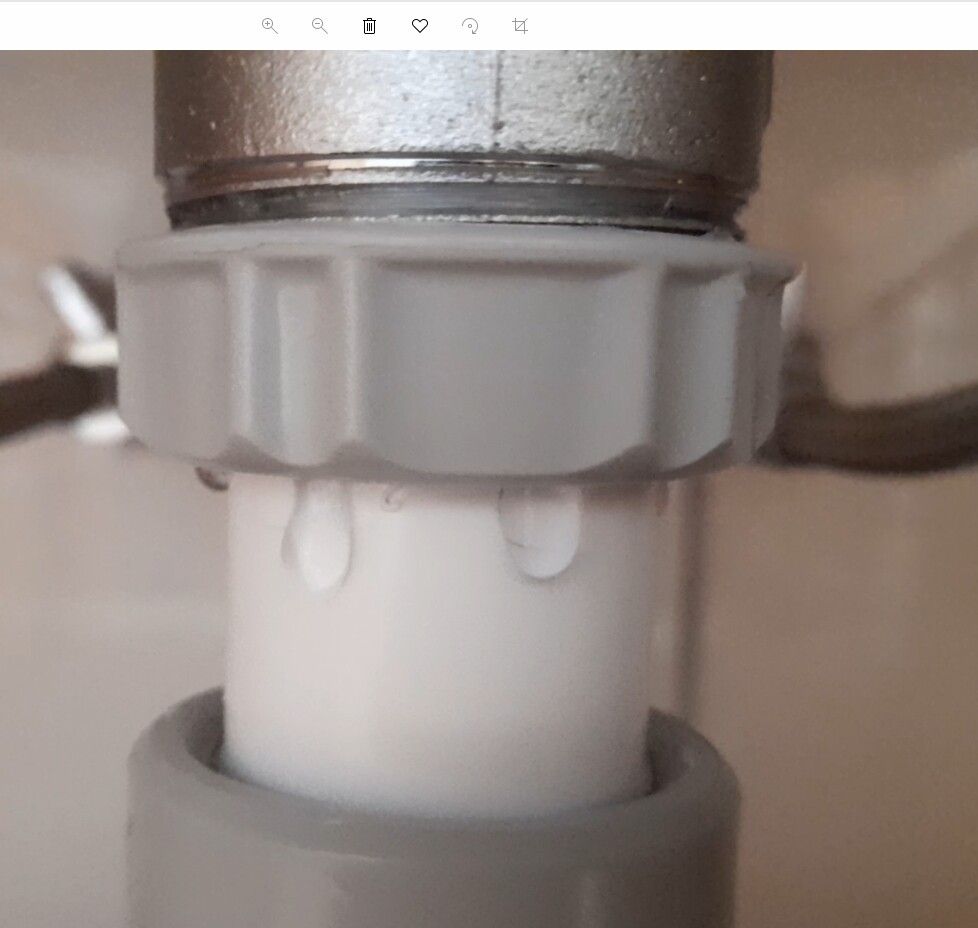
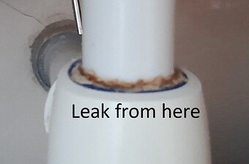
Well, I’ve changed it. Unfortunately the news is not good. The leak is worse than before.
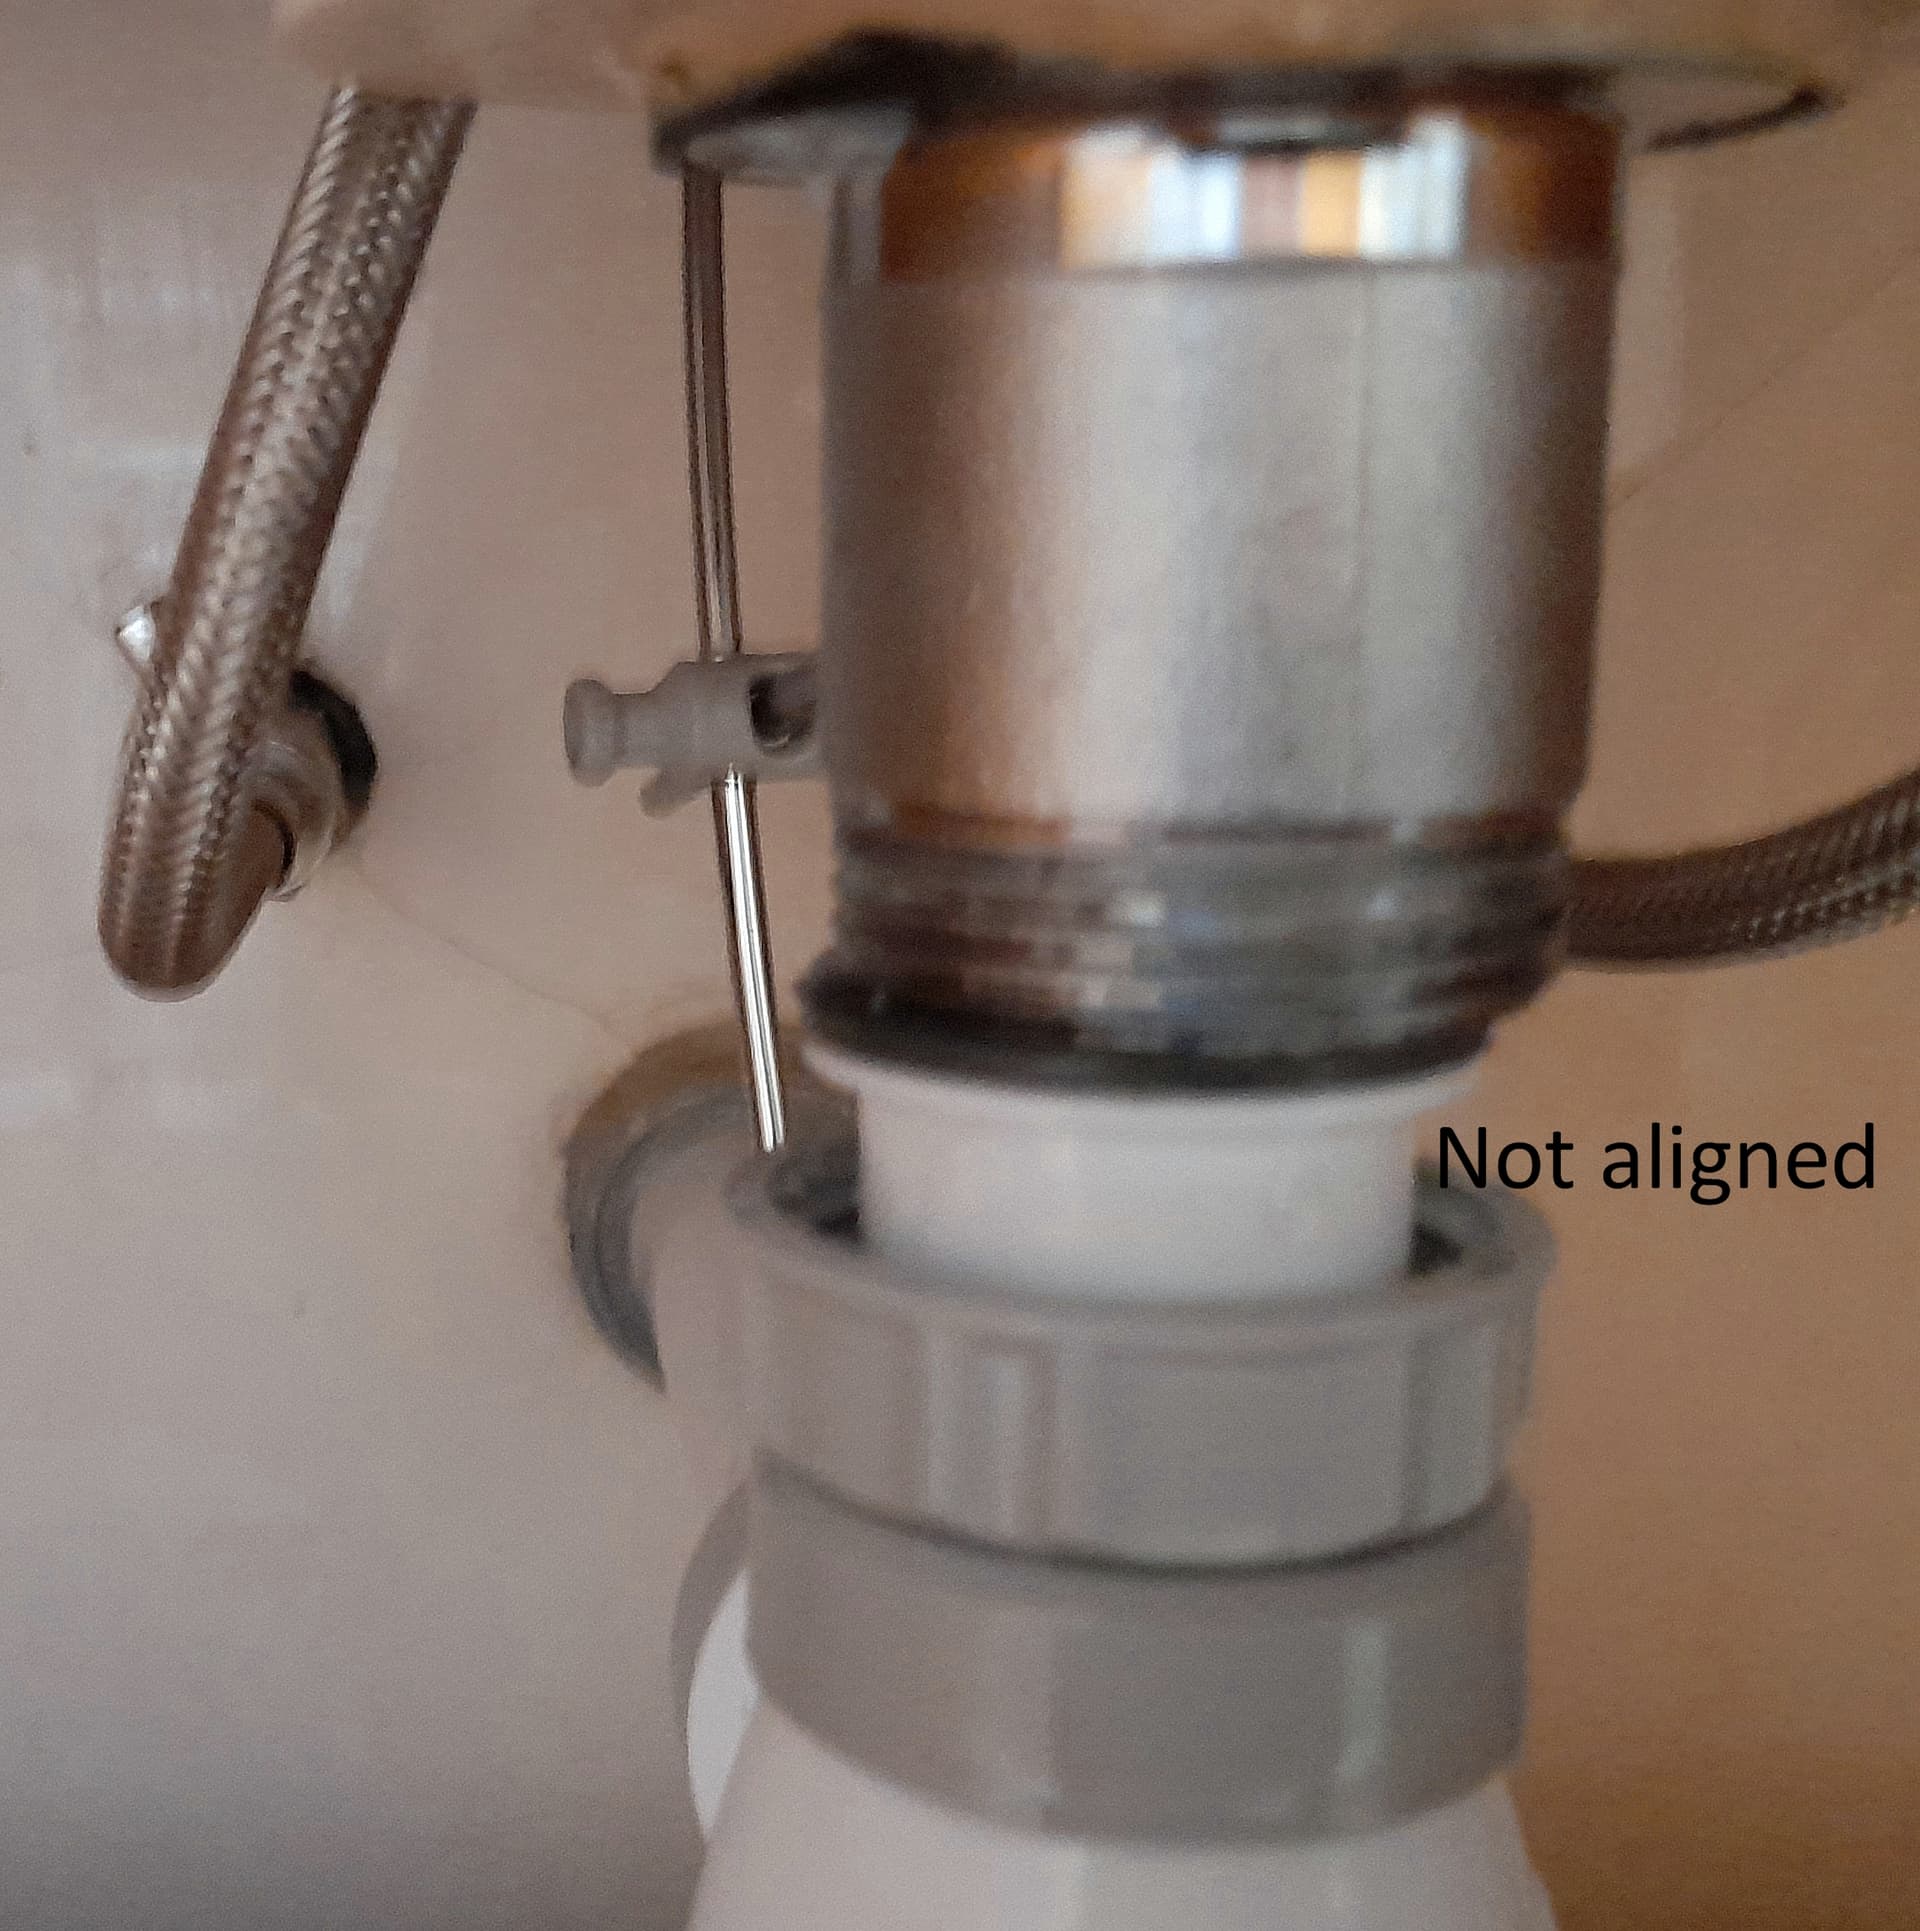
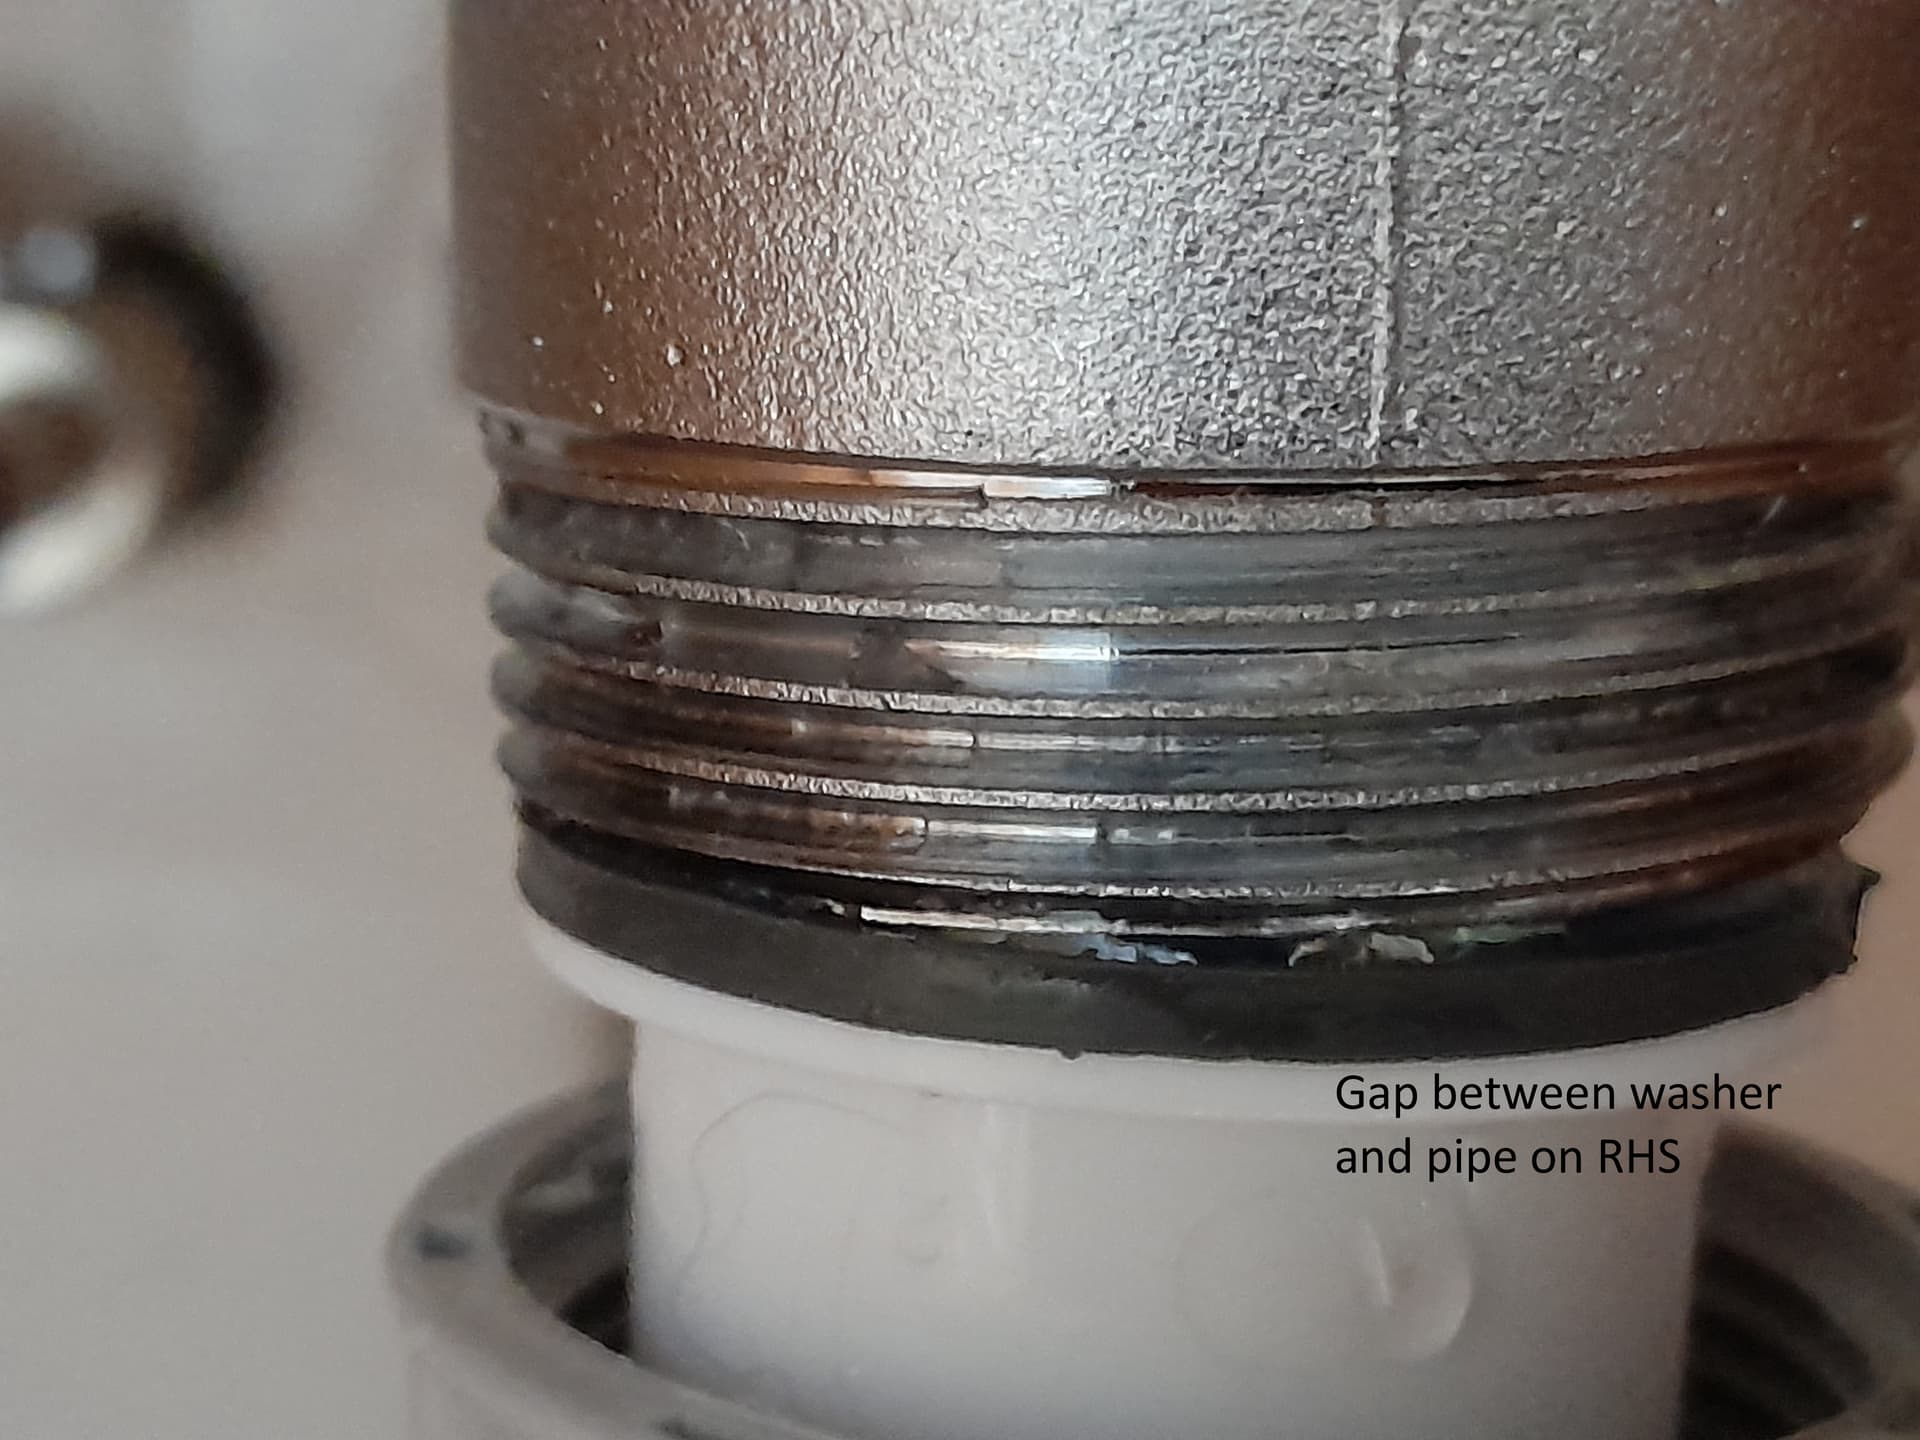
The problem seems to be that the pipe coming out of the sink and the pipe coming out of the wall are not well aligned, so the syphon is not vertical but at an angle, which means the washer is not making a good connection with the pipe from the sink. Grateful for suggestions please. Thanks.
It shows how unappealing trying to understand the tax form is when one resorts to joining in a thread on leaking bottle traps …
It is squint
and it’s leaking from the side which has the gap on account of the squint.
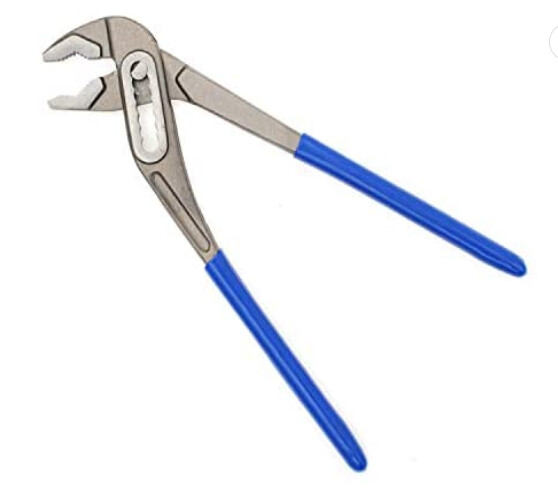
As has been said, no tools are necc, although these plastic trap and pipe fittings can bind and need a deal of hand-power or better still, an adjustable pipe wrench to get the fitting turning. Once freed up, they unscrew easily.
A household really must have one of these to do this sort of sink/basin job. Mostly, it’s the only tool needed and that only to get the fitting turning - the rest can be done by hand.
When putting it all back together be careful not to over-tighten plastic screw fittings. You may think that if it needed the wrench to get the fitting to turn, it will need a meaty nip up with the wrench when refitting. Not so. These plastic fittings will distort if over-tightened and Lo! You have a leak!
Tighten by hand as tight as your hand can manage. That should be enough. If your grip not strong enough and it is weeping a little, wrap a face cloth or one turn of a towel round the fitting and tighten again. You should not have to use a tool on these plastic fittings to have them leak free.
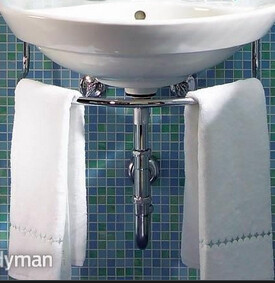
The pedestal is there only to hide the pipework and trap from view. It should not be taking the weight of the basin tho’ it might be resting on it. The original installation will have the basin perched on the pedestal while the real supports are installed. Basins on pedestals are actually supported by hefty screws thru the back of the underside of the basin into the wall.
So the pedestal can be eased out from under the basin - you might have to do a bit of wriggling but it will come out . Then you have all the room you need to work on the fittings.
You could get rid of the pedestal by having snazzy chromed fittings that don’t look naff.
I’d swop a basin job for doing my tax form. ![]()
You obviously have me confused with a contortionist/strongman. ![]()
![]()
However, I’ve just checked my basin and it’s a no-go.
The basin fits beautifully onto (and over) the pedestal. It’s clearly (and beautifully) shaped to do just that and there’s no way I could slide the pedestal out without lifting the basin…
I’ve checked OH’s bathroom and his basin is exactly the same. Purchased many years before mine… it came with legs, so no problems with plumbing.
When we tried to buy exactly the same set-up for me… we were told “legs were no longer available” so we bought the pedestal that matched.
I feel a song coming on… legless in my bathroom… ![]()
![]()
![]()
I’d suspect there should be enough “give” in the pipe leading from the to get things lined up, try to make sure the bottle trap stays level and you don’t wind up twisting it to get it to mate up but move it laterally.
You might find that getting hold of a slightly thicker rubber washer of the right diameter helps as well (but can be tricy to source).
I have had this problem. The solution is to slack off the fixing bolts just enough to allow the pedestal to wriggle out from under. Just a few turns to give a few mm wriggle-room is enough.
This may work … Or at least it’s how I get them fit when they’re a bit out.
The bit that screws onto the sink - do that first finger tight without straining. All the other screw threads should be loose to give you max wiggle room. Including the one at the top of the trap itself.
Then get it to attach to the waste pipe - do the screw thread up lightly wiggle and shake and give it a slap until it finds a balance then tighten everything up.
It’s a bit of a bodge but it’s simpler than fixing the slight offset
Longer term there are flexible wastes that are probably your simplest solution - but you probably don’t want to be hacking pipes at the moment I’d guess.
I can imagine that would be an exercise in plumber’s French, accompanied by much sucking of teeth and “Well, bring the trap and fittings in and we’ll see if there’s a washer that will do.”
I’d go for a new trap, m’self, properly lined up, as you say.
I’ve got a new trap. It’s worse than the old! Thanks everyone again for your comments. At the moment I am cleaning up the original trap because it seems to me it’s a better made piece of kit than the one I’ve bought this morning.
I’ll try to get it straight, but not sure it’s possible - the pipe from the sink is fairly short and very rigid.
I might be able to do something with the washer from the original trap together with the washer from the new trap.
Thank you to everyone who refrained from making too much of the likely state of the syphon itself. It was absolutely clogged with long hair - hence no doubt the leak. Never occurred to me I needed to look - I always clean the outlet pipe from the sink beautifully.
Every single one of the teenage girls who has stayed in the cottage has had long hair! Plus a couple of the mothers and one of the men. ![]()
I live and learn!
Sue, heat the pipe with a hair dryer until it softens a little then move it where you need to to straighten it.
I said originally it looked like a mis alignment
Lots of soda crystals/powder in boiling water, once a week for a gite, I’d say, and any household with someone with hair like Vero’s. And does she not have 5 daughters? The hair-in-the-plumbing problem must be a nightmare, chez Vero.
The soda crystals must be thoroughly dissolved. A plumber told me how he tipped soda powder into a sink then the water. The soda powder set like concrete and he had to dismantle the whole rig to clean it out.
Not only deals with the hair but the sludgy deposit that builds up from soapy water.
Ah - that’s too hi-tech for me. I am delighted to be on the town sewage system in Vire.
Are soda crystals in such quantity OK with a reedbed sanitation system?
(I have long hair too, but the waste goes to reedbeds and we have to be careful what goes “down the drain”.)
Ours is “the town system” at least it’s “the village system”.
We were amazed and pleased when the Council discussed future plans.
Everyone had a say and got to vote on what they wanted… and the resounding vote was clear…
Although Reedbed was more expensive to put in place, it is much more environmentally friendly than the other options on offer.
Quite so, and that’s exactly what I do, plus a bit of fishing from time to time because it’s not just hair, earrings seem to love going into the trap too. I also have some of those tea-strainer wire mesh plughole inserts, which helps but they sometimes get dislodged.