Building an internal wall from old scaffolding boards

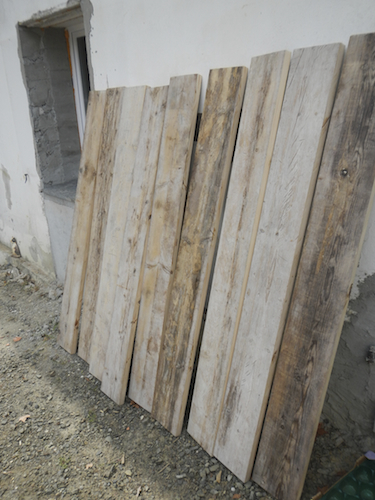
Following on from the success of the pallet table project, I decided to recycle a pile of old scaffolding boards that are no longer sturdy enough to serve their intended purpose.


Click on any of the images for a larger view.


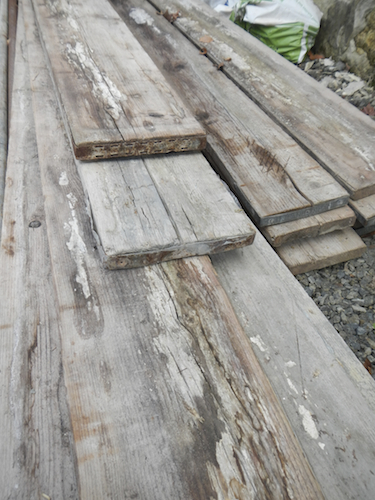
As you can see from the ends of these 4 meter long planks they have begun to split down the center and in places are very weak.


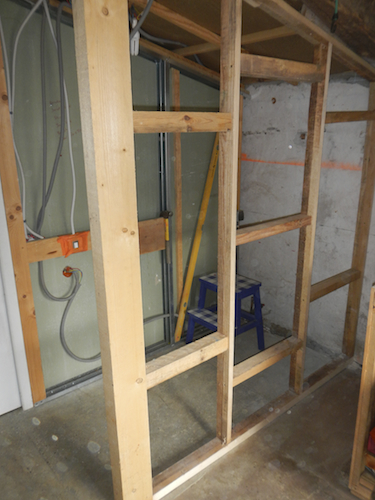
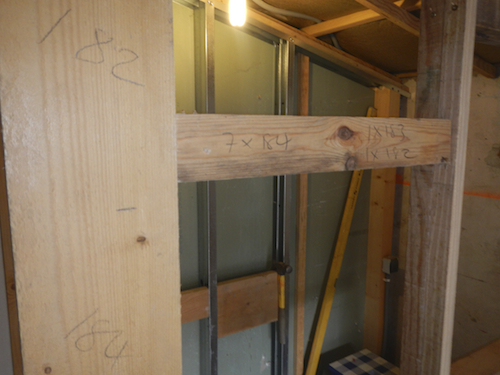
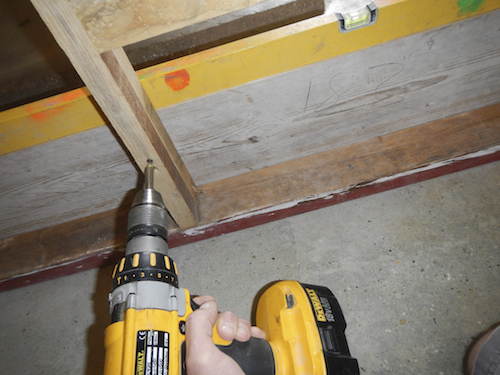
First step was to build a standard timber stud partition, I’ve got good fixings in to the wall, ceiling and floor around every 50cm/18" or so. I included a larger joist as an upright on the left hand side as this will support a door later.


I've made some fairly rough measurements at this point so that I can cut the good sections from the damaged boards and handle them more easily.


I then cut to length the best sections of the boards trying to avoid any that had spilt.


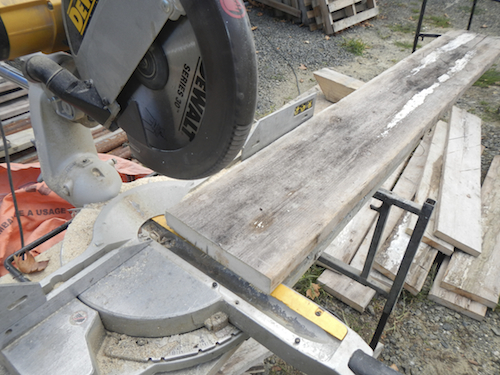
Then, using the table saw I removed 5mm or less than 1/4 of an inch from either side leaving me with a nice straight edge, you could do this with an electric plane too if you don't have a table saw.


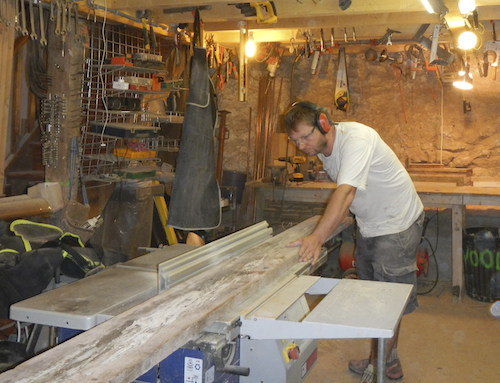
Everything now gets sanded on both sides, I could have just done the exposed surface but I wanted to remove any residue from the timber so that it will be easier to treat later.


All the planks are now prepared, they are slightly oversized and I can now easily cut them exactly to my requirements.


Starting at the base of the wall I've put in a couple of screws to hold the first board in place making sure it's perfectly level.


Now it's a simple case of continuing to the top, still only using a couple of screws for each board at this point. The boards at the top of the wall require extra trimming which I did on the table saw, a jigsaw would be fine for this too.


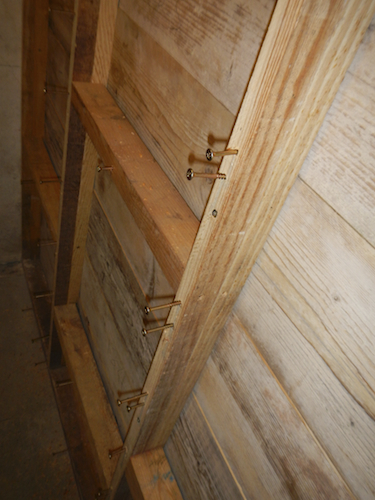
All the boards are now securely fixed in place with 8 (6.0x100mm) screws each. Notice I've attached them from the back of the wall so as to not have any visible fixings on the front.


Everything is now firmly fixed in place and is ready for a soaking with anti-termite treatment (which will penetrate better due to the sanding on both sides), I quickly applied this using a garden sprayer, after an hour it got a second coat.


That's it for now, I'll let the wall dry out a little before I decide whether or not to apply any surface finish as the boards will shrink slightly having previously been stored outside. If you have any timber that you want to work with and you're not sure of it's humidity content, bring it inside and store it for a few weeks before you use it.


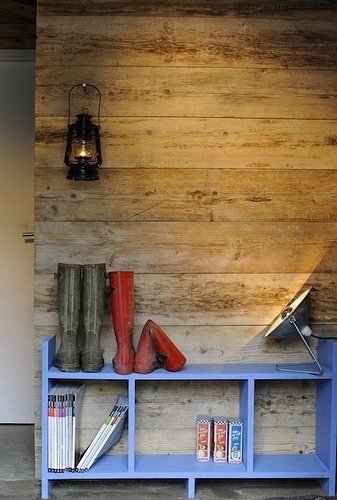
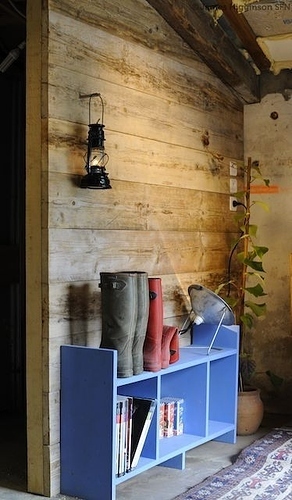
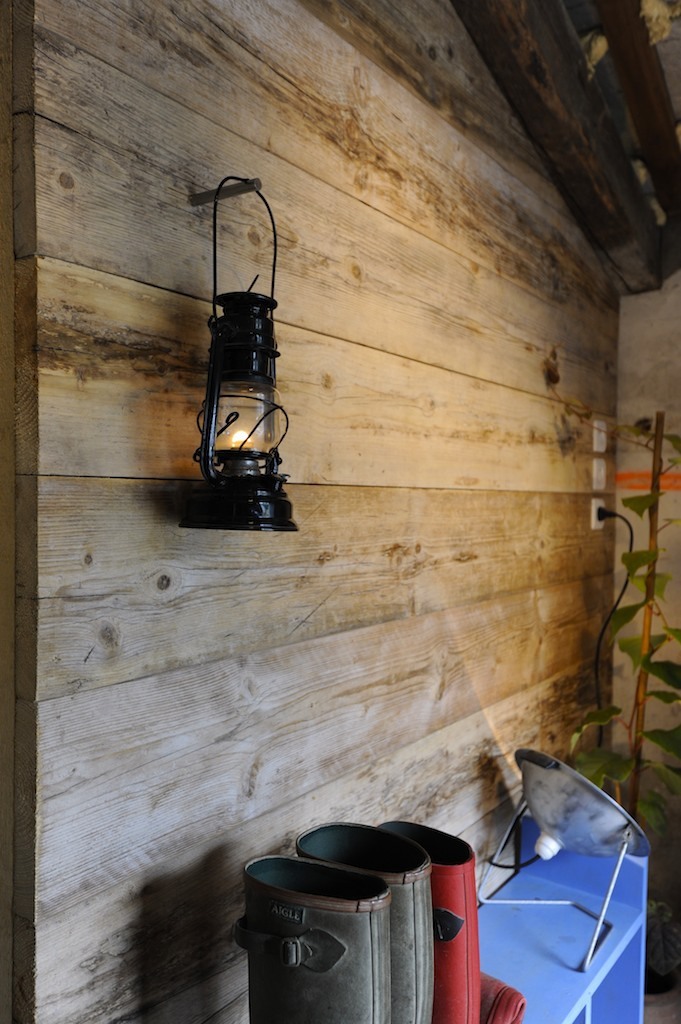
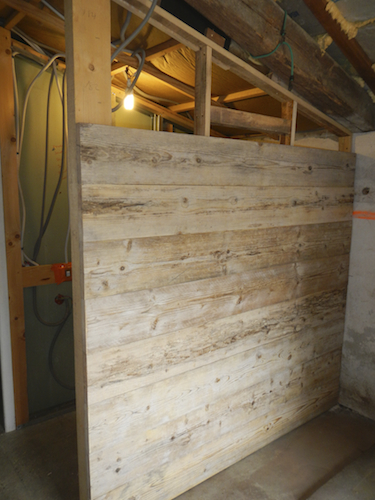
The finished wall, which I think you'll agree makes a lovely warm and unique feature?


loverly!

You're welcome, it's a bug*er and all of us with old houses have to take it seriously.

Thanks for that Brian, it confirms what I thought. It will await the 2014 programme of improvements - or bank account emptying as it's also known.

Yep, need profis there. We had treatment and the guy explained how the larvae live in the wood for several years before they emerge. Only real injector treatment works. If the beams are badly attacked, in fact killing off the larvae makes no difference, gone is gone. As you say Mark, a lot of beams are not treated. When people had wood fires and smoky interiors it hardly affected them, since modern heating and the end of open fires the beetle larvae are having a feast. It seems that vat treated wood is save in the long run, as long as it does not have soil, bedrock contact, so is on metal stacks as many modern joists, then it is at least termite free. Treated wood is probably about 10 years good then needs through preventive surface treatment. I've splatted a couple of long horn beetles in our place this year, am worried...

Just a point on woodworm/beetle etc. I have treated some of my outbuildings 3 times (using compressor and spray can) with the best quality product I found. What I noticed though was that woodworm was killed off (or so it would appear) but the beetles are still munching away (I can hear them) and see the damage/debris on the ground.

So I think that maybe only a professional session will kill them off. In my case it's pine beams/joists that they have eaten and I will just replace all when funds permit. I think the joists etc were never treated (watch when buying folks).

I believe that if you treat the wood you are going to build with it'll be fine but if you have already the infestation then it's not effective.

Interested to hear the opinion of others though?

Hardly any of the beam affected left! Although when we were scraping out some of the debris, there were small silver beetles, I'm sure. Have just googled capricorn beetle, and I'm certain there were none of those present..... I know OH has already put some treatment on, but until we get there next week, not sure which he's used.

Fireplace, sounds like capricorn beetle (longhorn beetles) then if the holes are about big enough to stick a pencil in. If there is a lot profis in, just a little and even if it looks old treat it with a specifically capricorn marked treatment.

Oh, and no workshop as such, but a rather large grange which will act as one!

All these ideas for recycling (like the insulation, Brian), are more than welcome. Plan also to make some shelving, but that's a bit boring......

In fact, I've not looked, but is there a recycling section on SFN for just such ideas?

One of the issues facing us as we clear out old stuff to get ready for the big move is what to do with something that seems to be a shame to just throw away, but has no intrinsic or practical, only sentimental value, such as a collection of mini trophy cups and 1/2 pint and 1 pint silver plated mugs that belonged to OH's late aunt that she won for golf in the 40s/50s. After research, they have absolutely no value and due to the lead content under the silver plate, cannot be used for drinking. So instead of throwing them away (best advice anyone could give me), I've decided to turn them into a windchime.... When made (mmmmm, when......) I'll post a pic.... Unless anyone has a better idea?

Our boards are still in situ at the moment, but as there's approx 60 sq metres of them to go through once we take them up, hope to be able to recycle them in some way or another.

OH is asking for advice from those that are in the know, please? With regard to wood treatment, has/does anyone have any preference as to brand/type, etc? As we have quite a big area to treat (the whole of the grenier), can we get away with 'own brand' treatments? I'm aware that different areas of France have different problems (I think we're in a termite free zone, but something has eaten a beam away in the fireplace), but any advice would be welcome.....

Thanks

Carol, I am about to make some replacement doors with old floor boards. We need two outbuilding doors and have the boards we saved after stripping floors and sorting out woodworm eaten ones. One shed has a plastic water pipe into it that is at risk of freezing, so in this case it will be a very thick door of two outer floor board skins and polystryrene from old computer packaging cut to go between as insulation.

Like the plank wall too.

Looking at these and other pictures, I think I have far more workshop space (it was a milking parlour for 12 cows plus others waiting) that you but the difference is that you have really got yours sorted out whereas I have not, which means you work efficiently, find things and 'little' details like that and I am always saying "Now where is...." and wasting time.

Now I know what we can use the old floor boards for! Great inspiration, James! Although I think anything we make may take a little longer......

Love the red rubber boots. Oh ok, the wall looks great too!

No objections whatsoever Tony, thanks!

As you know James I am a builder and have been for over thirty years and as builder I have to say I am impressed. It reminds me of my great uncle many years ago, who used to say "don't through that away I can make something out of it". He would never through anything away and made various things.

It’s so easy these days to just buy new instead of recycling, I take my hard hat off to you.

I have decided I am going to set-up a couple of pages on my website to show just this sort of project, if anyone else has any similar projects they have carried out I would be very interested, please send me an email.

If you have no objection James I would like to put this project and your pallet table project on the new pages.

Well done.

Tony Cox

Looks great. Thank you.

They were mine already Mark, they were just a bit long in the tooth to continue using them as they were. The studding is quite narrow, the thick planks take care of that though. I'm sure they would be too flimsy for a thinner cladding. Glad you like it!

Thanks

James

Excellent work, interesting feature. The studding looks so puny against the 'meaty' scaffolding boards. Did you come across the boards locally then or how did you find them?

Just like the Little House on the Prairie - yeah ha!

ooohh how exciting, keeping fingers crossed...