Hi Sue,
it’s beautiful.
I wonder if there’s some kind of glue solution /stabilising fluid that can be poured over and left to soak down through to just set everything in place ???
Hi Sue,
it’s beautiful.
I wonder if there’s some kind of glue solution /stabilising fluid that can be poured over and left to soak down through to just set everything in place ???
@SuePJ I have to admit that my first visualisation of the situation was of an area of basically sound floor tiles with the odd broken one here and there due to a localised subsidence. The suggestion of backing the replacement tile with concrete was to make it stronger and thus resist it cracking again in the future.
Clearly the real problem is that the tiles that were laid onto the bare earth never were strong enough for the intended use. Had something the thickness of paving slabs been used then the problem would never have arisen to the extent that it has.
Repairing what you have is really not an option in my view as the entire surface is clearly just fracturing and powdering under the load to which it is being subjected.
I gather from your other ongoing thread about the roof tiles that you seemingly have plenty of potential substrate material already on site. Have you considered using the roof tiles, together with the broken floor tiles, as a compacted rubble substrate for a new floor I wonder ?
I believe you mentioned an old tobacco drying shed as having been dismantled, so do you perhaps have a stack of old wooden boards somewhere ? If so, then you could clean them up with a belt sander and then use them to create an ancient looking wooden floor for your terrace that would be in keeping with the period of the building.
Another option is to become a brick / floor tile collector for a while. Ask around friends and neighbours, or put a ‘wanted’ add on ‘Le Bon Coin’, and perhaps you will be able to find some folks who would be glad for you to just come and take the things away. Another option is to visit all the builders and tile merchants in your area and see what they have that is an end of line that they need to get rid of. You’ll end up with a bit of a mad mix, but then you can use your artistic flair to arrange the different ones in patterns that appeal to the eye.
A contrasting stripe down the middle, diamonds or squares of different colours, areas of ‘herringbone’ pattern, the options are endless.
@RayR That could work provided that the surface became something just to look at, and was never walked on again. With the lack of foundation, plus the constant undermining by burrowing critters, the surface would just crack again as soon as it was walked upon.
I agree that it does look pretty from a distance though.
From the photos Sue has kindly provided, it would seem that the basic problem is that with the non-existant foundation, the constant foot fall is just grinding the remains of the tiles into powder. As a terrace floor for walking on, that which exists has simply come to the end of its practical life, and this situation has been exacerbated by the fact that unsuitable materials and /or unsuitable methodology were used to construct it in the first place.
Yes Ray that was the important bit i forgot about, perfectly safe to use. Just wish I’d bought one when they first came out, I just thought they were a gimmick, how wrong was I
No missing bodies in the area, is there? 
Just want to say thank you to everyone here for your constructive suggestions and to say there is much here for me to think about and take forward when we do the terrace properly. And now, you have the opportunity to say “Oh Sue, you didn’t!” and say such things as “Typical woman, hasn’t listened to a word I said!” But what you have all done is made me think long and hard about what I can realistically do right now. So (gulp) to explain.
When we moved here 13 years ago, our second summer we had a big lunch party at a long table on the terrace and I realised at the last minute that some of the tiles where the chair legs would be were badly broken. I had little or no time and so I cleared out the old tiles and laid the new ones on sand. Looking at them now, 11 years on I’ve realised that (a) they are all still there and I’ve not done anything to fix them down. (b) A couple have cracked, but only single cracks across the middle, so I expect I didn’t use enough sand.
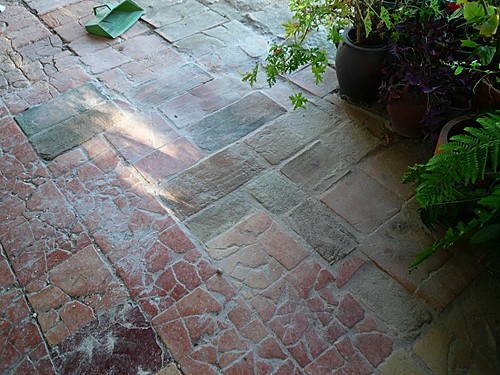
I’m wrong about their being straight down onto earth. There is a layer of what looks like a kind of “chape” and some of the tiles have already been replaced and cemented in. I’m coming to the view that with the movement of the house, fixing the tiles so that there is no scope for them to move/give a little means that they are more likely to crack. Also if I bed them into sand they can then be taken up in a few years and reused, whereas if I fix them in permanently they will have to be broken up. So, I’ve done a small patch, kept as many of the old tiles as possible, removed the really bad ones, carefully tapped out the “chape” (which is risky as it disturbs adjacent tiles) and filled in with replacement tiles laid on sand. The layout at the moment is, of course just random. Anyway, this is what it looks like …
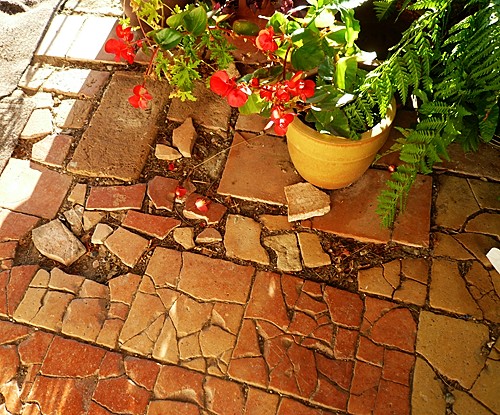
Before …
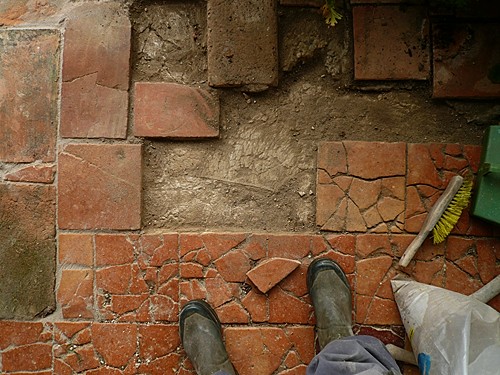
The damaged tiles removed and the “chape” exposed …
The final effect. I’ve left the sand as I expect they will settle and I’ll have to brush more into the gaps between the tiles.
Just to say thanks again. If you hadn’t contributed I would still be looking at this as an elephant task and not thought about it properly and got on with it, at least as an interim step that will improve the look of the terrace over the short term.
This is just the start. There are lots of other places on the terrace that need doing, but I can now at least approach them with some confidence.
Well done… looks great. 
@Stella Thanks Stella. In the end it was fun to do it. Here’s hoping they last for a few years!
Well done Sue, looks smart that, and ultimately you worked it out yourself, thats how I learn
@boilerman Thanks John. As I’ve said elsewhere, I wish I’d gone the technical route at school. Would have loved to have done stuff like this properly.
I don’t know whether it exists, but a band saw with a diamond blade would work. I’m talking about a big version of the sort of thing that you do fretwork with, having a flexible blade.
I’m interested by the contrast between your views about laying tiles and the techniques I learnt on Tiez Breiz’s course on “Laying quarry tiles the ancient way”. They recommended laying a bed of sand with very little lime in it (think it was 1:6), “glueing” the tile down with a lime/water mix, painting tile with milk to avoid staining, then grouting with a fine sand and lime mix. One of the aims is to preserve the breathability of the floor, avoiding moisture being forced up the walls. It has worked well for me. A friend with a more modern building, used as a shop, layed a concrete slab, then a bed of dry sand, and laid the tiles close with no adhesive or grout.
Having seen the photos I think you need more tiles. I bought direct from producers and it was much cheaper than DIY shops. You can also buy secondhand - see tommettes, terre cuite, e.g. https://www.leboncoin.fr/bricolage/1876376819.htm
@Vivien_Chapman Thank you for your observation Vivien and link to leboncoin. If you mean the crazed tiles, I have no problem with leaving them.
As I mention above, these are old tiles and a different size from what’s available now, so it’s only someone who is restoring an old property who can help me. Also, as mentioned earlier the last thing on earth we have at the moment is money to spend on replacement tiles, so I’m using what we have lying around the place (including those with mortar on the back) and replacing only those that have disintegrated or where the crazing has broken out of its position on the terrace. Not to everyone’s taste obviously, but I’m liking the effect and fortunately so is OH.
I thought your old broken tiles looked lovely too! So glad you are saving them. If I was trying to get the cement off some of them I would soak , then support them on sand or similar as suggested, and use a small sharp cold chisel (and goggles).
My house had a beaten earth floor when we bought it - hadn’t been lived in for 150 years, and I avoided new square tiles by getting slate from a nearby quarry. Photo below, on a rather untidy day. My quarry tiles are in a more modern part of the house. I also had really thick square quarry tiles in a 1700 house I had in the Midlands which were re-layed. My background is in museum conservation, so of course i can’t throw anything old away.
I don’t know anything about the date or construction of your house, or what has been been done to it, but I would caution against using cement in any house built before 1900. https://www.standardheritage.uk/technical/lime-mortars/ for instance. Or https://en.wikipedia.org/wiki/Lime_plaster. Contrary to Wikipedia I have never been burnt by lime, but in France you buy lime as powder in a bag, and use straight away, it isn’t the same as quicklime. It is much easier for an amateur to use than plaster or cement because it dries slowly. You can use the rest of your wheelbarrow full the next day, and also smooth over any cracks.
My apologies if you know all this already, and good luck!
Vivien
@Vivien_Chapman No need at all for an apology. Your floor looks wonderful. And thanks for the thoughts - lovely to hear from someone who understands old buildings. Ours is at least 350 years old - we are on the Cassini map.
We were very lucky some years back. OH was removing old lime plaster, in all innocence, and finished up at A&E and in hospital on a drip - he didn’t realise he was allergic to lime. So the doctors banned him from our house while it was being renovated. At that moment we met someone who restores old buildings and works all the time with lime and he came to our rescue and we’ve never looked back.
I won’t have lime powder around because of OH, but I have bought a tub of lime putty, which I just love. I can play around with mixes in small quantities and dyes and have repaired small areas in our gite and round the house.
I’m interested in your comment about needing more tiles. I assumed you were referring to needing to replace the crazed ones. I’d love you to explain what you do mean. Thanks.
Hi Sue
Haven’t heard about lime allergy before.
I’m in Brittany and lime reached here very late. No lime kilns in north west France so they built in clay until transport was cheap enough, well into the 20th century. This house was built in 1533, mud was used as mortar in the walls and as plaster. I love the idea that when you dismantle something there is nothing to go to the tip - stones (schiste and granite) saved for another job, and mud to the garden. However I have used lime and sand for most things. I did do an Enduits de Terre course, and wonder if that technique would be useful for you. You test your garden soil for clay content, and mine was ok, mix it with hemp fibre and chuck it on the wall. It has good insulation qualities. Those walls and that room feel different from the rooms with lime plaster.
With the tiles, those that are fragmented, but all the pieces are there look fine, but there were places where pieces were lost. Wonder if you could shuffle a bit and fill in, perhaps at the sides, with something different e.g
I have a long term plan for a conservatory and the floor will be a mixture of my left over quarry tiles and left over slate. #
Good luck !
Vivien
@Vivien_Chapman
Hi Vivien,
There are of course many different methods of laying a tile or stone floor, and which is best depends upon many factors such as whether it is inside or outside, strength of tile to be used, whether it requires to be insulated, and what the finished visual effect is desired to be.
Personally I prefer a floor surface to be flat, level, stable, and if indoors, waterproof.
I know there are many people who for various reasons seem to like the ‘breathability’ factor, but I have another word for it, namely damp.
My own home is constructed of what could best be described as ‘field stone’ walls cement rendered on the outside, and built directly onto the earth.
Fifteen years ago we had cracked, cold, and damp tiled floors that ‘breathed’ an aroma of mold into the rooms and rising damp that also ‘breathed’ even more of a foul odour through the failing ancient wall covering. (To call it plaster would be a misuse of the term.)
Floors were stabilised with concrete where needed, a damp proof membrane installed, insulated, and a new floor laid on top. Walls were lined with insulated waterproof plasterboard. The result is a reduction of 50% on our heating bill, no more damp patches or bad smell, vertical walls, and a flat, level, and stable floor that makes fitting cabinetry so much easier.
As I said, the method used has to take account of the desired objective.
These days any ground level interior floor of an inhabited space simply has to be insulated, not only for the comfort of the occupants, but also to reduce our use of energy and associated long term carbon footprint.
Outside, I prefer always to construct a substrate of either well compacted rubble or reinforced concrete from which to work, basically because one of my objectives is to only ever have to do the job once.
Hi Robert
Do you still have the concrete render on your walls? It seems to me that could have been part of the problem.
I agree about insulation under floors, but not necessarily about flatness. The first floor I did here was in slate, and it slopes. It was originally in beaten earth, and even I can’t see a way of living with that. The house is 16th century, schiste, granite, clay mortar, (and clay plaster where it survives), no foundations, but partially built on rock. Leveling the floor would have meant undercutting the walls or raising the floor level, and inserting a step. Later there was a flash flood here in my absence. The water ran straight through the house from back to front causing no damage, except to a rug that got wet. This had obviously always been the way of things, there were slabs in the doorway with a water passage beneath. I did the slate floor 30 years ago, when we thought less about insulation. Earth, hardcore, lime mortar, slate. It’s cold. More recently in a newer part of the house I did a quarry tile floor, earth (well rocky earth), geotextile, lime/sand/cork bead insulating layer, then the layers I mentioned before. The lime/sand/cork mix dries like expanded polystyrene and is warm to the touch. I would have put it under the slate floor if I had known about it then. I have a museum conservation background but am by no means an expert in these things, but they do seem more complicated than simply waterproofing. Look at the houses in South Wales where cavity wall insulation is having to be removed.
You mention energy and carbon footprint. This house has survived for nearly 500 years, and was empty for more than 100 years (used for cider making and storing potatoes), so the builders must have got something right. And its materials can be recycled.
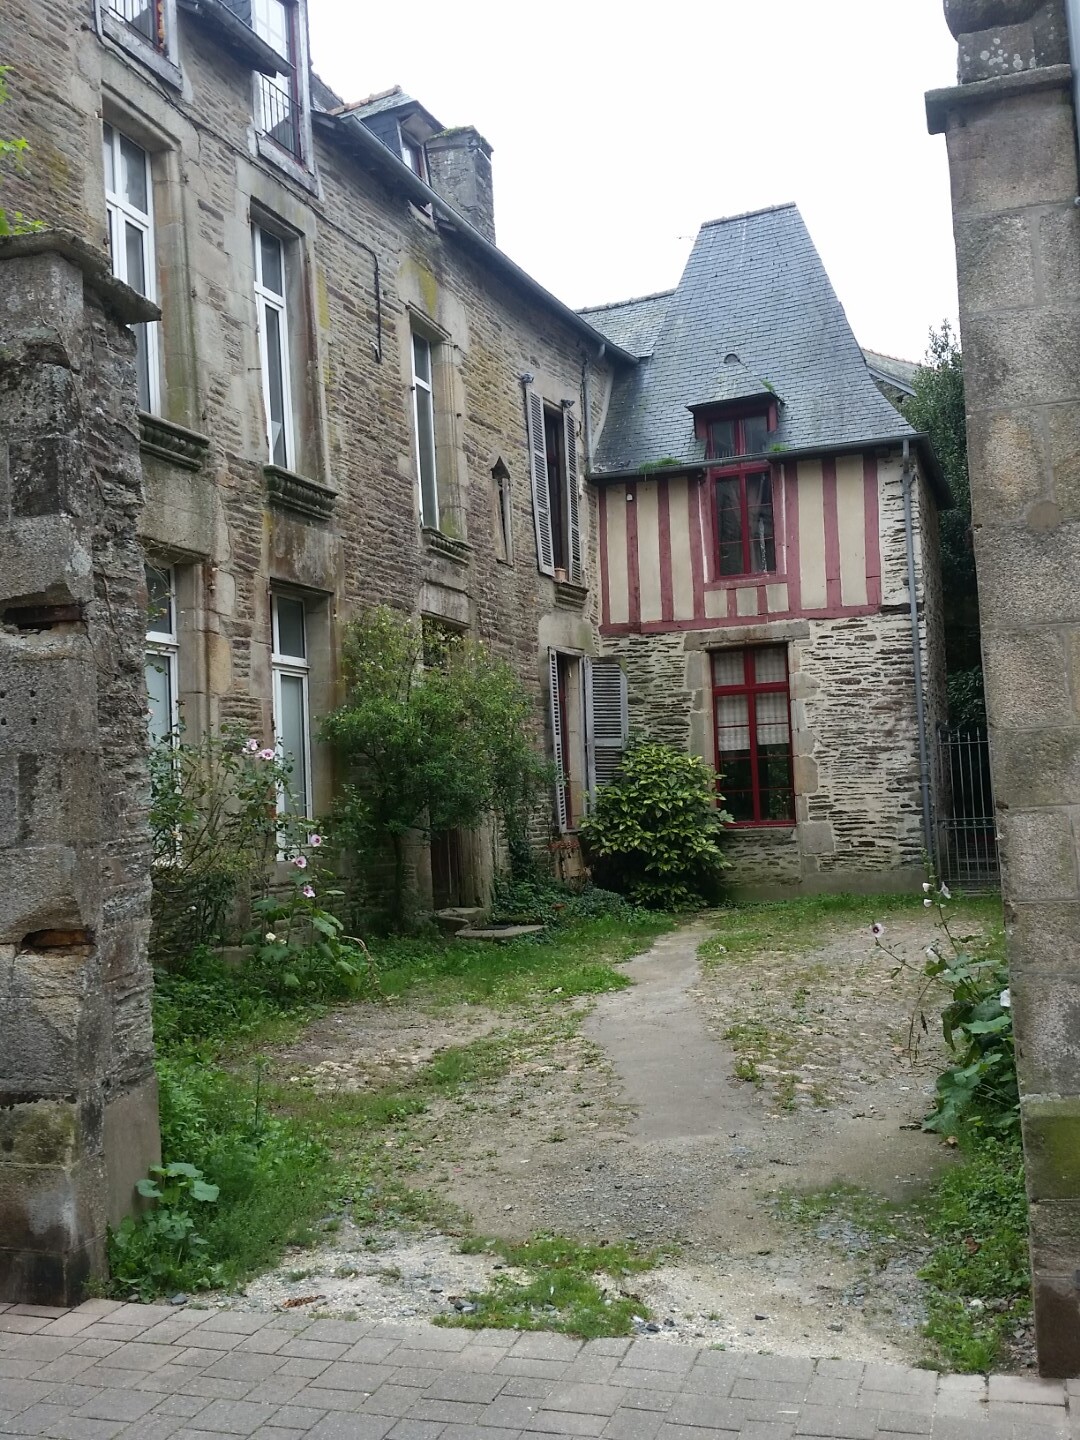
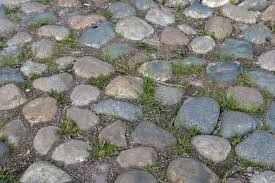
We all look for evidence to support our own points of view, so I don’t expect to convert you or to embrace concrete myself. . But if I had a yard I’d like it to look like this. (Town centre, Ploermel)
Best wishes,
Vivien
Hi Vivien,
Yes, we still have the exterior cement rendering just like all the other houses in our village center. The stone walls are not of quarried (cut) stone, but are a mish-mash of all sorts of odd pieces of stone of whatever type could be obtained at the time of construction and includes Limestone, Sandstone of various colours, Granite, and even pieces of Marble. Hence the cement rendering to tidy it all up and make it waterproof.
We couldn’t change the appearance even if we wanted, and could afford to do so, as we live within the 500 metre range of the church which is classed as an historic monument.
The lime/sand/cork granule mix you used interests me. Is it something you made up on-site yourself, or were you able to buy it in a bagged pre-mixed form ?
Indeed it is interesting how different people like different things. I must admit that I like the plants against the wall in the photo you refer to, even though they could seemingly do with a bit of TLC from a gardener. As for the yard itself, I have to admit that my first thought was that with a good dose of weedkiller, and a couple of tonnes of gravel, it could be made to look very neat and tidy and a credit to the neighbourhood.
Have a safe day,
Robert.