Rendering a stone wall for less than €17 (Yes, seventeen!)

https://youtu.be/9AfSfCBVq70


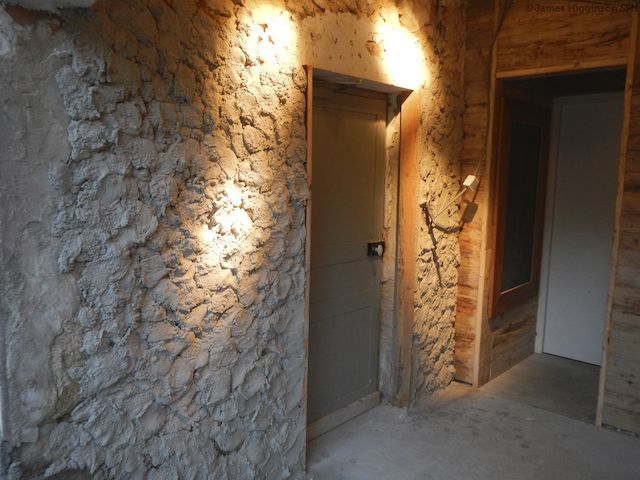
Lime rendering on a small scale like this is quite an easily manageable DIY task. It's also pretty cheap to do and environmentally friendly as we won't be using any cement.


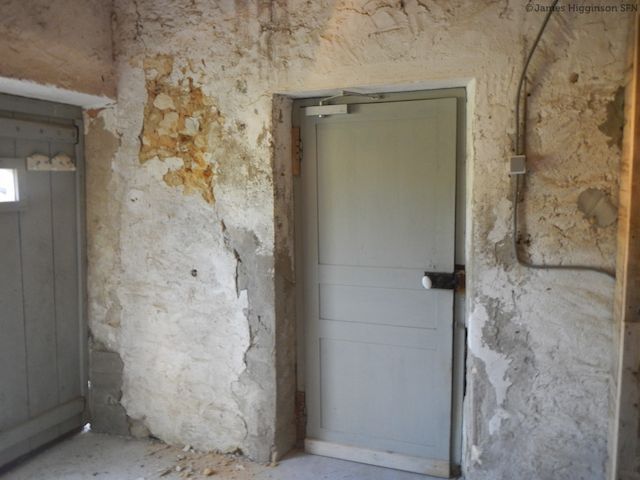
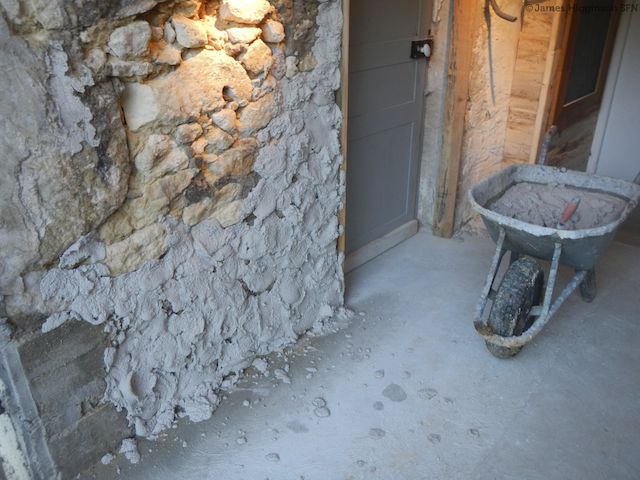
First job is to remove the old render or whatever you have covering the wall. In this case using only a hand pick I was able to remove the sandy crumbling render very easily in about an hour. If you have a tougher surface, you might need a breaker or marteau piqueur


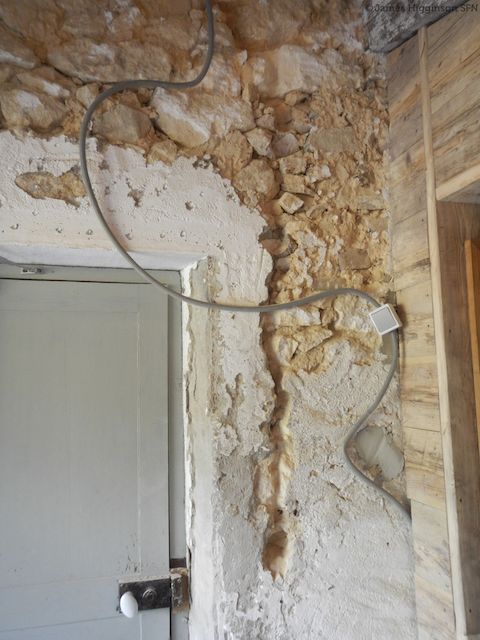
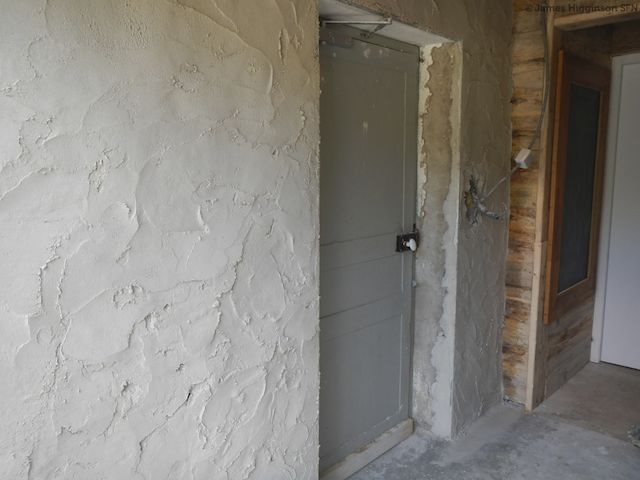
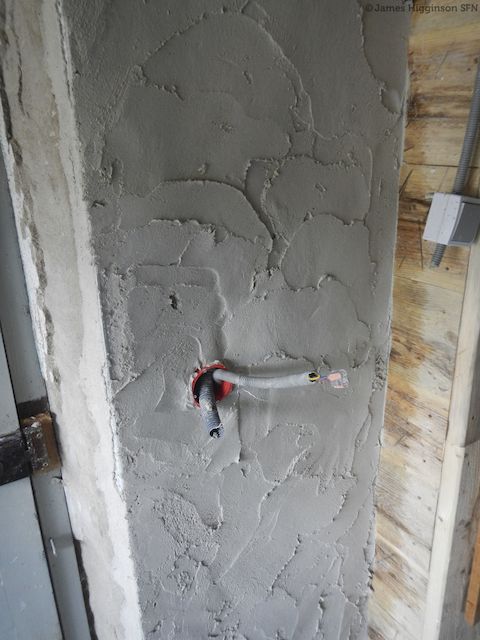
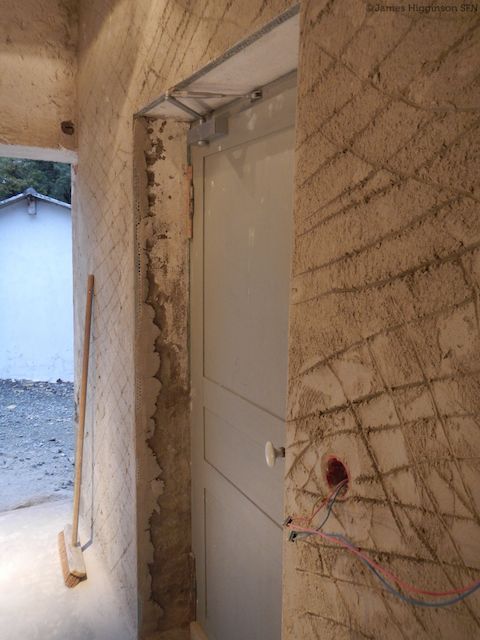
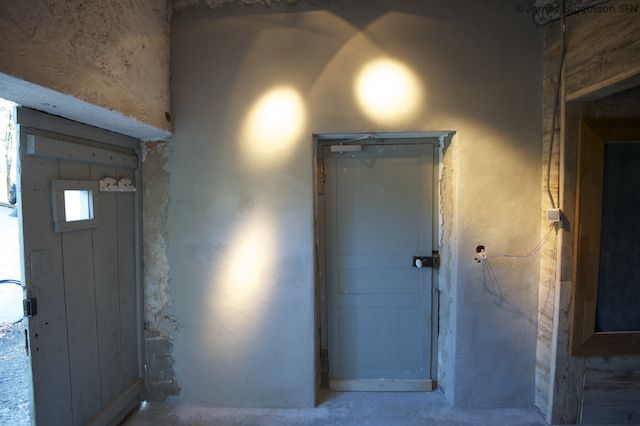
Chase out any runs for conduits and pin them securely in place, you dont want them popping out when you're throwing your render at it later.


The wall is prepared and swept, I've also thoroughly wet it, I will do this throughout the process as it will help the mortar to adhere and stop it drying too fast which will cause it to crack.


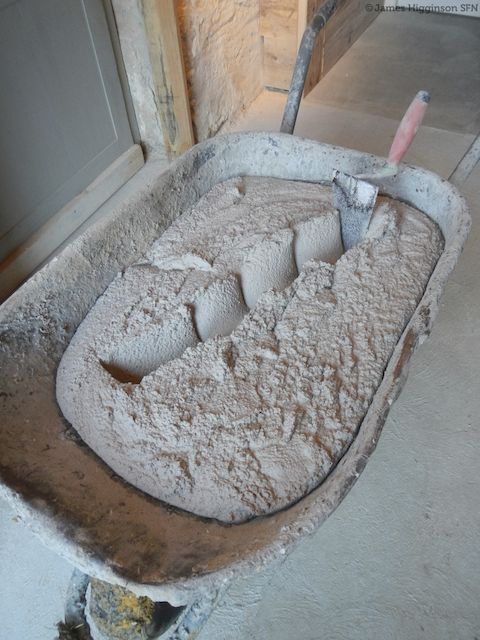
The mix I'm using is 1 part White Hydraulic Lime Chaux Hydraulique Blanche to three parts sharp sand Sable à bâtir. The mixing instruction are on the bag, you can use a concrete mixer or a drill attachment. You can see it's not too fluid. If it's too wet it's going to drop off the wall, too dry and it won't stick at all.


Using a flicking action apply small amounts of the mortar with a trowel, the effect of throwing the mix like this expels and air and improves adhesion. The first time I ever did this, I simply threw it at the wall using my hands. You'll need to wear gloves and eye protection for this, the lime is corrosive.


As there is no cement involved the mortar remains maleable for quite some time, especially if you cover it with a sheet of plastic. Using the back of your trowel, smooth everything out as flat as you can get it. Begin this process after about half an hour; too soon and it will drop off. Don't worry about making it perfectly flat, your second coat will do that.


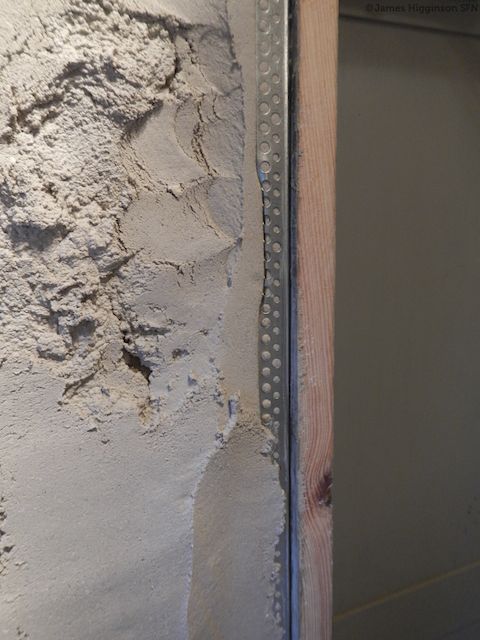
Use these beads to strengthen corners and make it easier to achieve your smooth final finish. You can stick them on in advance with some contact adhesive or even silicon, the render will hold them fast eventually.


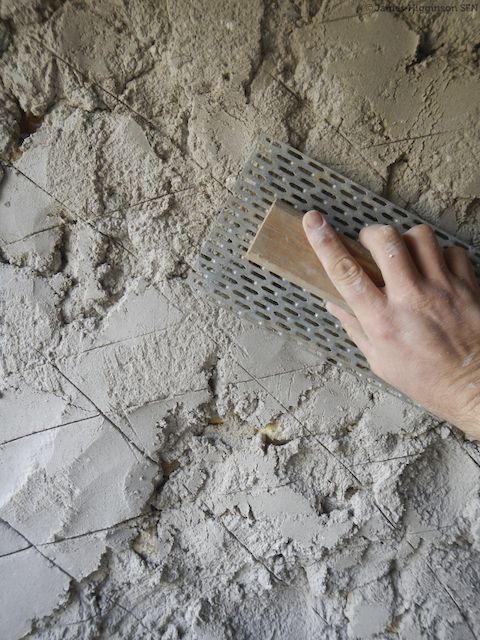
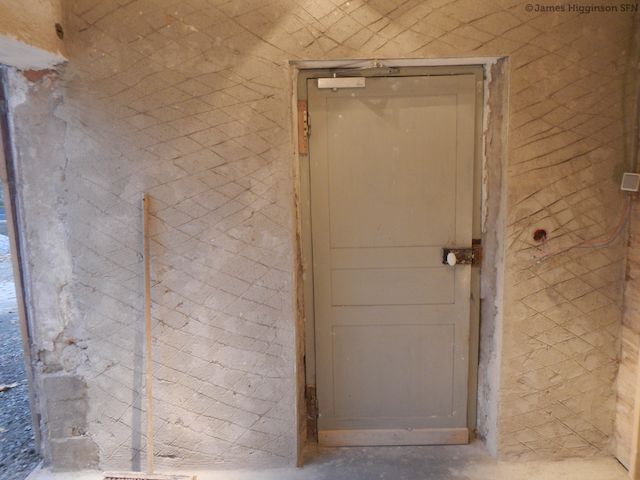
Once it's as flat as you can get it, score the soft render in a crosshatch fashion; this is going to help the next coat to adhere. This is called a scratchcoat.


You can get a flatter finish using a Taloche à pointes - you can't do this until a few hours later.


The following day, apply a second coat; you won't need anything like as much mortar.


Finish it off with a trowel and taloche again.


Sctratch it ready for the final finish.


Top tip: Add PVA (Wood glue) to the final coat to seal the render and stop it being permanently dusty.


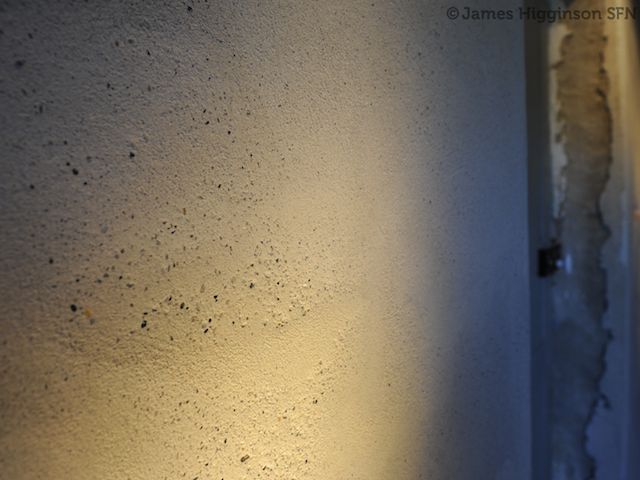
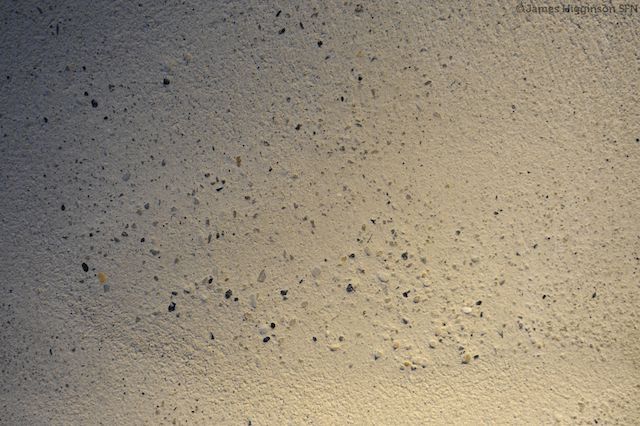
You can finish with the Taloche à pointes if you like, you'll get a very typical 'Aquitaine' style finish. I prefer this outside though as it's quite rough. In this case I have used a damp sponge, this creates a nice tactile finish as it exposes and cleans the tiny aggregates in the sand. These two finishing methods are also quite easy to achieve. Trowel flat finish will take some practice.


Cost of materials used, 1 bag of Lime (€12) and 110 kg sand (€3) 500ml PVA (€1.50)


Total cost €16.50, total time to do the job was about 8 hours over three days.


What do you think, would you have a go at this?


1 Like

Use an NHL 3.5 for Basecoats and NHL2 + 3mm down sand or finer for skim coat for finish depending on degree of finish required

1 Like

To avoid the part cement mix find out if you need chaux hydraulique or chaux aérienne and then look carefully at the bags. In fact if you go to a place like Bricomarché or Mr Bricolage all they have often is the mix, so go to a builder's merchant like Chausson or Point P where they will have all kinds. Making own lime paints is very easy and costs a fraction of the price of bought stuff. We have done a whole room including the floor for which I spent an extra €5 to buy a bottle each of linseed oil and turpentine for less than €20 and we have lots of pigment for making more paint, plenty of chalk anyway plus the oil and turps for wood, enough to do an entire house for under €50. Bought lime paint does not do that and also won't do your floors.

2 Likes

St Astier do a complete range of Lime Paints for English info see www.stastier.co.uk

All the Info for rendering or if indoor usually called Plastering is also on the above site

Be carefull what lime you use as most of the products marked CHAUX actually contains some OPC Cement

We don't use PVA glue but looked into it. The sand grains keep it separated enough to be able to stop seepage of water but not absolutely a bit of humidity and still allows the wall to breathe. It is used so commonly in this part of SW France and has been for long enough to have provided evidence of negative effects. However, we use chalk paints that we make up ourselves, with clay based pigments for colour as required and possibly would use clay paints if we were in an area where that is the available raw material. The latter is the traditional and the condition of some of the walls here that are many decades since rendering suggests that PVA is a pick or choose matter that probably has benefits if people use it.

Brilliantly shown, I did this when living in Pembrokeshire as a builder as many homes required it done there, however never used pva glue, that might seal the dust but isn’t that stopping the wall from breathing? Would paint it with Clay paint after to seal and allow to breath on internal walls

1 Like

What a wonderful sequence of pictures to help us poor diy' ers to gain some confidence.

Thanks for taking the time to share.

2 Likes

Merci James - I am getting excited by all the paint possibilities.

1 Like

Have you seen Catharine's review of the Autentico range here Ray?

1 Like

Ray, as many as in the UK. Seek and ye shall find.

Thanks everyone -you have really got me interested in enviro - friendly paints. ECOS paints can be bought in the UK - any eco paints in France?

Hilary, Martha Stewart, the mama of food in the USA has a recipe for milk paints: http://www.marthastewart.com/272306/milk-paint-recipe

We downloaded it a while ago for the room we are working on at present and will give it a go. That is to say, we have not tried it yet. Much cheaper than buying Casein paints as well.

Me again, but this really might come in useful for the group....

http://www.mikewye.co.uk/earthborn.htm

Mentions casein....which it turns out is milk protein.....Thanks John Withal

The link is about sculpture, so they are more fussy, but the milk idea looks OK. There are milk paint recipes around, though I've never tried. Please post and say how it works out

Wow folks, I think I've stumbled across an unusual solution...

http://mothrasue.blogspot.fr/2013/05/sealing-brick-chimney-with-evaporated_13.html

Will certainly give it a try ....and for anyone else with the same problem she gives another link....

http://www.ecospaints.net/stabilizing-treatment.html

Halleiluja !

Thanks Vivien,

I have read the info in the link, but it's a bit daunting because they make it clear that a lime wash can react badly in certain circumstances. I'm not about to engage a lab (as they suggest) to determine why it's making so much dust....so what I'm asking is whether anyone knows of an off the shelf stabilising solution that might do the trick. But it does have to be microporous.....

Try limewashing it? The lime will penetrate and consolidate. Often used for crumbling stonework in the past http://www.stastier.co.uk/nhl/guides/shelt.htm

Is there anything ...a microporous sealant perhaps ?....that I could buy at the Brico.....?

If the wall is to breath then PVA shouldn't be used as the vinyl in poly vinyl acetate is no different to the vinyl used in vinyl paint. PVA when used externally and getting wet can re emulsify ie break down. There are natural alternatives to help with dusting ike casein, linseed oil or tallow.

1 Like

Whoops - the unwashed sand had to be sieved to get the stones out. He used an old wire mattress base.